It doesn’t take long to transform your lawn into a verdant, lush area. You can immediately improve your home’s curb appeal, enhance your soil, and enjoy a long-lasting, healthy lawn by following this simple guide to getting sod installed. This book takes you through every crucial stage from preparation to long-term maintenance whether you’re replacing existing grass or getting sod installed for the first time.
1. Getting Ready for Sod Installation
It’s crucial to adequately prepare the soil before laying sod. Your new lawn will grow robust, healthy, and green from the beginning if you prepare it well. Installing sod will be more successful and durable if you take a bit more time now.
Clear and Level the Area
Clean up the area where the sod installed will be beforehand. Clear away any rubbish, rocks, weeds, and old grass. Next, loosen the top 4–6 inches of dirt with a rototiller. This facilitates improved water drainage and provides space for the new sod roots to develop deeply and robustly.
Test and Improve the Soil
Great lawns begin with healthy soil. Use a simple soil test kit to check the pH and nutrients. Ideally, the pH should be between 6.0 and 7.0. If needed, add lime to raise the pH, sulfur to lower it, or compost to boost nutrients and soil quality.
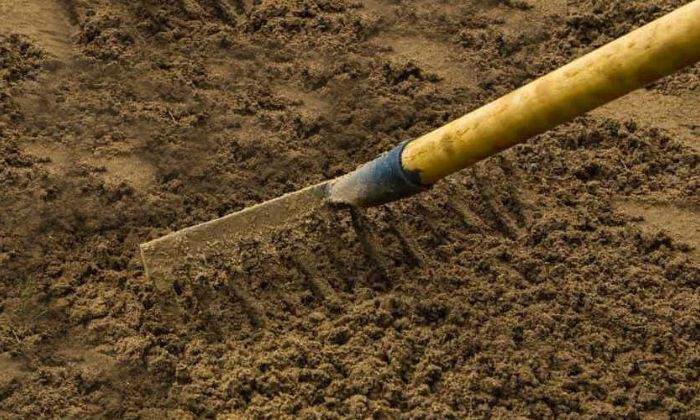
Smooth and Grade the Surface
Verify that the space is level and has good drainage. Slope the ground a little bit away from walkways and structures. Level out uneven areas and lightly compact the ground with a rake or lawn roller so that it is not too hard to walk on.
Add Starter Fertilizer
Use a phosphorus-rich starter fertilizer to aid in the rapid and robust growth of the new sod roots. After putting sod, this provides your lawn a head start and encourages healthy development.
Your yard is prepared for the following phase, which is the sod installation, once you have finished these stages!
2. Step-by-Step Sod Installation
The secret to creating a long-lasting, thick, and healthy grass is the installation of sod done correctly. To assist your new sod in settling in and becoming robust, follow these easy steps.
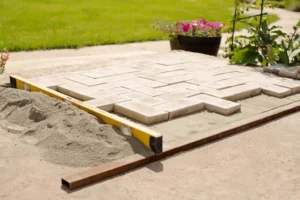
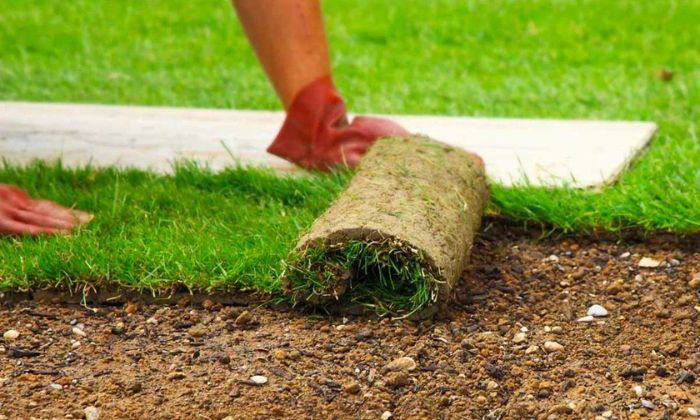
Start Along a Straight Edge
Start by laying sod along the longest straight border, such as a fence, sidewalk, or driveway. This maintains the rows even and aids in directing the remainder of the arrangement. For a seamless, smooth appearance, place each piece next to the one before it carefully and firmly.
Join the Seams
Ensure that each sod piece’s edges touch without overlapping. To avoid gaps that could dry out or allow weeds to grow in, press the seams tightly. Tightly laying the sod promotes more even rooting and makes your grass look cleaner.
Cut Neatly Around Edges
To cut sod around curves, sprinklers, or flower beds, use a sharp knife or sod cutter. To avoid harming the roots, never rip or tear the sod. Tight fits are made possible by clean cuts, which also aid in the proper connection and growth of the sod.
Roll the Sod
Use a lawn roller to smooth out any air pockets and press the sod firmly into the ground after it has been laid all the way. Enhancing root contact with the soil is a crucial stage for rapid and robust growth. For optimal results, try rolling the sod within 30 minutes of installing it.
3. Watering New Sod
Watering is one of the most important steps after sod installation to help the grass take root and grow strong.
First 14 Days: Keep It Moist
Water the sod as soon as possible after the installation of sod to maintain uniform moisture. You might need to water two or four times a day in warm weather. Make sure it doesn’t dry out, but don’t wet it. To prevent excessive evaporation, water early in the morning or late in the afternoon.
Weeks 3–4: Water Deeply
You can water less frequently as the sod begins to take root. Make sure to water once a day, but deeply—roughly 4 to 6 inches into the ground. As a result, the roots get deeper and more robust.
After One Month: Adjust as Needed
You can water once or twice a week after the sod has taken root. The weather and season determine how frequently; hotter months may require more.
4. Mowing New Sod
Mowing helps keep your new lawn healthy and looking great.
When to Mow
Wait until the grass is three to four inches tall, which is typically two weeks after the sod is installed. Before mowing, make sure the sod is firmly established by giving it a little twist.
Mowing Tips
- A third or less of the grass height should never be chopped off at once.
- To prevent tearing the grass, keep the blades on your mower sharp.
- To ensure balanced growth of the grass, switch up your mowing technique every time.
5. Ongoing Sod Care and Maintenance
After your sod installation is complete and the lawn is growing well, regular care will keep it healthy and green.
Fertilizing
Throughout the growing season, apply a slow-release fertilizer that is high in nitrogen to your grass every 6 to 8 weeks. This promotes consistent, healthful growth.
Weed and Pest Control
To prevent weeds from growing, apply a pre-emergent pesticide in the early spring. Treat weeds as necessary if they emerge. Keep an eye out for grass illnesses or pests, particularly during hot, muggy weather.
Aerating and Dethatching
Aerate your grass once a year to facilitate the easier uptake of nutrients, air, and water by the roots. Additionally, get rid of any thick thatch—a coating of dead grass and roots—that might be preventing development.
How Much Does Sod Installation Cost
The cost of sod installation typically depends on several factors, including the type of sod, the size of the area, your location, and whether you hire professionals or do it yourself.
Here’s a general breakdown:
Average Sod Installation Costs (U.S.)
Type of Cost | Price Range |
DIY Sod (Material Only) | $0.30–$0.85 per sq. ft. |
Professional Installation | $1.00–$2.00+ per sq. ft. |
1,000 sq. ft. Lawn (Installed) | $1,000–$2,000 |
Cost Factors
- Type of grass (e.g., Bermuda, Kentucky Bluegrass, Zoysia)
- Soil preparation needs
- Accessibility of the yard
- Delivery fees for sod pallets
- Removal of old grass or weeds (can add $0.20–$0.60 per sq. ft.)
Why Choose Sod for Your Lawn
Compared to seeding, sod offers quicker, lush results, greater erosion control, and fewer weed issues.
With this guide, you can quickly transform your yard into a beautiful, vibrant space that enhances your home’s curb appeal.
you can read about French Drain Installation
Final Thoughts
Installing sod is one of the quickest ways to achieve a stunning lawn without the wait associated with seeding. By following the steps outlined in this guide—careful preparation, proper installation, and ongoing maintenance—you can enjoy a lush, healthy lawn in just a few days.
Whether you’re upgrading your lawn, starting fresh, or boosting your curb appeal, careful planning and consistent care are essential for success. Follow this guide, and your lawn will flourish season after season.
At Lakota Design Group, we offer professional sod installation services to help you create the lawn of your dreams quickly and beautifully. Let our experts assist you at every step of the process.