Creating a beautiful and durable outdoor space begins with mastering the best way to install pavers. Whether you’re designing a cozy patio for relaxation, a stylish walkway to enhance your landscape, or a sturdy driveway to boost your curb appeal, proper installation is key to ensuring lasting, professional results.
If you’ve ever wondered how to install pavers or what the best way to install pavers is, you’re in the right place. This comprehensive guide will take you step-by-step through the entire process—from preparation to the finishing touches—helping you craft an outdoor space that is both functional and visually stunning.
Why Choose Pavers?
Pavers are one of the most versatile and stylish materials for outdoor hardscaping. But what makes them such a great choice?
Durability – Unlike traditional poured concrete, pavers resist cracking and can withstand heavy foot traffic and vehicle loads. Their interlocking design allows for slight movement, reducing the risk of unsightly fractures. By understanding how to lay pavers properly, you can ensure they remain stable and durable for years to come.
Aesthetic Appeal – Available in a variety of colors, shapes, and textures, pavers can be customized to match any design preference, from classic brick patterns to modern, sleek layouts. Knowing the best way to lay pavers enhances both their visual appeal and functionality.
Easy Installation & Repair – Laying pavers is a manageable DIY project. If one gets damaged, you can easily replace individual pavers instead of redoing an entire surface—saving time and money. However, understanding how to place pavers properly is key to preventing issues like shifting or uneven surfaces.
Superior Drainage – Pavers allow water to drain between the joints, preventing pooling and minimizing erosion, making them an excellent choice for areas prone to heavy rain.
Increased Property Value – A well-designed paver patio, walkway, or driveway enhances curb appeal and boosts your home’s market value, making it a smart investment for homeowners.
Step 1: Prepare the Area
Pre-Demolition and Excavation
Before laying pavers, you need to prepare the ground. Mark the area with stakes and string to ensure you have a clear layout. If there’s any existing concrete or grass, remove it entirely. The excavation depth should be around 6-8 inches for walkways and patios, or up to 12 inches for driveways. Using a shovel, dig out the designated area to the proper depth. If the soil is loose or sandy, you may need to dig deeper and add extra base material for stability.
Grade the Area
The ground should slope slightly away from buildings to allow proper drainage. A 1-inch drop for every 4 feet is a good rule of thumb. Proper grading prevents water from pooling on the surface, which can lead to erosion or instability over time.
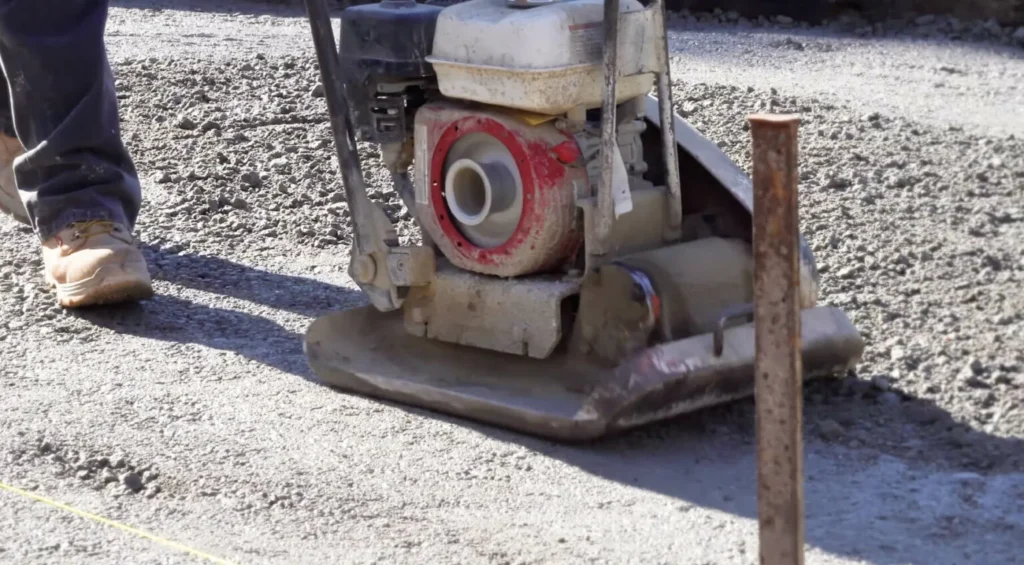
Compact the Sub-base
Using a plate compactor, firmly press down the soil to create a stable foundation. This prevents shifting over time. If you don’t have access to a plate compactor, you can use a hand tamper, but it may take more effort to achieve a firm base.
Step 2: Add a Base Layer of Gravel (Road Base)
A 1-inch layer of sand ensures a smooth surface for paver placement. Use a straight board to screed the sand evenly.
- Pour the sand over the gravel base and spread it evenly.
- Use a long, straight piece of wood or a level to smooth out the surface.
- Avoid walking on the sand once it’s leveled to prevent shifting.
Pro Tip: Opt for coarse, washed sand rather than fine sand, as it provides better stability for the pavers.
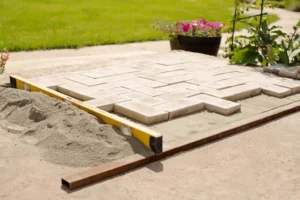
Step 3: Add Bedding Sand
A 1-inch layer of sand ensures a smooth surface for paver placement. Use a straight board to screed the sand evenly.
- Pour the sand over the gravel base and spread it evenly
- Use a long, straight piece of wood or a level to smooth out the surface
- Avoid walking on the sand once it’s leveled to prevent shifting
Pro Tip: Opt for coarse, washed sand rather than fine sand, as it provides better stability for the pavers.
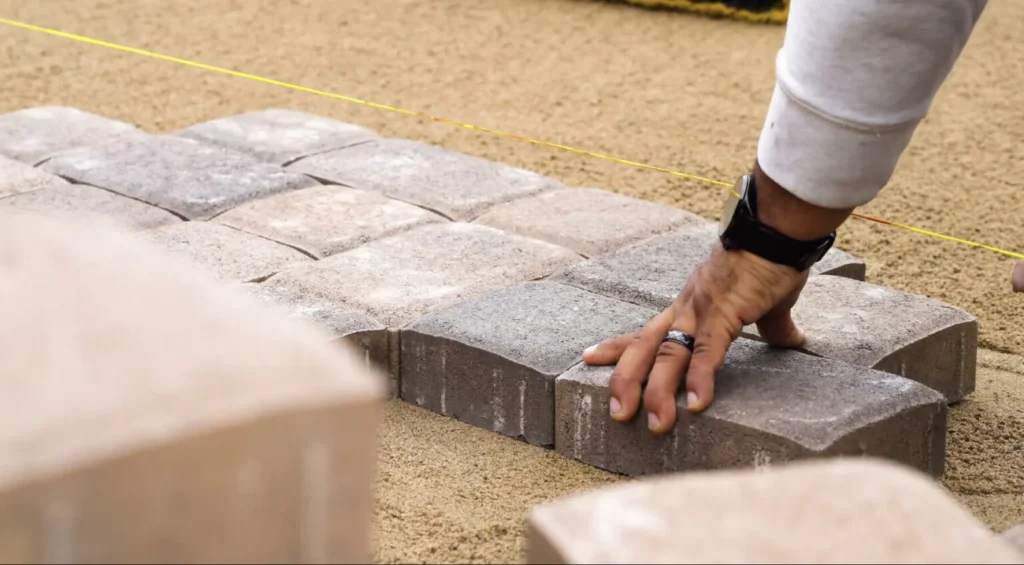
Step 4: Start Adding the Paving Stones
To ensure uniformity, lay all full-sized pavers before cutting edge pieces. Working in small sections ensures that each area remains level before moving on to the next.
Best Way to Install Pavers: Work in small sections and periodically use a rubber mallet to tap them into place. Remember, certain patterns, such as herringbone or basket weave, may require extra time and precision during placement.
Step 5: Continue Laying Full Paving Stones
To ensure uniformity, lay all full-sized pavers before cutting edge pieces. Working in small sections ensures that each area remains level before moving on to the next.
Best Way to Install Pavers: Work in small sections and periodically use a rubber mallet to tap them into place. Remember, certain patterns, such as herringbone or basket weave, may require extra time and precision during placement.
Step 6: Cut Small Pieces to Fit Edges
For border areas or odd spaces, you’ll need to cut pavers to fit. Use a masonry saw or chisel to cut pavers to the correct size. Always wear protective gear when cutting pavers.
- Measure and mark the paver where the cut needs to be made.
- Use a masonry saw with a diamond blade for clean cuts.
- Alternatively, use a chisel and hammer for a more traditional cutting method.
Double-check measurements before cutting to ensure a precise fit.
Step 7: Install Edging for Stability
Edging is essential to keep the pavers from shifting over time. You can use:
- Plastic or metal edging secured with stakes.
- Concrete edging for a more permanent solution.
Edging not only enhances the overall look but also helps keep pavers in place and prevents them from spreading out over time.
Step 8: Sweep Dry Sand Into Gaps
To lock the pavers in place, sweep fine polymeric sand into the joints. This helps prevent weeds and enhances stability.
- Use a push broom to spread the sand evenly.
- Work the sand into the gaps between pavers.
- Mist the surface lightly with water to activate the binding agent.
How do I install pavers securely? Using polymeric sand helps prevent erosion and keeps the pavers tightly interlocked.
Step 9: Finish Compacting and Sealing
- Use the plate compactor to settle the pavers further.
- Apply another layer of sand and repeat sweeping.
- Optional: Seal the pavers for extra protection against stains and wear.
Sealing pavers enhances their longevity and makes maintenance easier by preventing stains and mold growth.
Step 10: Enjoy Your New Paver Patio or Walkway!
Now that you know how to lay pavers, step back and admire your hard work. Whether it’s a stylish patio, functional driveway, or charming garden path, properly installed pavers add value and beauty to any outdoor space.
Maintenance Tips for Long-Lasting Pavers
To keep your paver surface looking its best, follow these maintenance tips:
- Regularly sweep and rinse off dirt and debris.
- Reapply polymeric sand as needed to prevent weed growth.
- Clean stains promptly using mild soap and water.
- Reseal the surface every few years to maintain durability.
Final Thoughts
Laying pavers may seem like a daunting task, but with the right steps, attention to detail, and a bit of patience, you can create a stunning outdoor space that enhances both function and curb appeal. Whether you’re crafting a cozy patio for summer gatherings, a charming walkway to guide guests, or a durable driveway, the process is all about preparation, precision, and care. If you’re wondering how to install pavers, following a structured approach ensures long-lasting results.
By following this step-by-step guide, you now have the knowledge of how to install pavers like a pro. From excavation and base preparation to laying, securing, and sealing the pavers, every stage contributes to a long-lasting and visually appealing result. The beauty of pavers lies not only in their elegance but also in their flexibility—offering countless design options to fit your personal style.At Lakota Design Group, we specialize in bringing outdoor spaces to life with expert landscape design, professional paver installation, and high-quality craftsmanship. If you want a flawless, hassle-free installation, our team is here to help. Contact us today to learn how to install pavers with precision, durability, and style.
FAQs
How deep should I dig for pavers?
For walkways and patios, dig 6–8 inches deep, and for driveways, dig 10–12 inches to ensure a stable base.
What type of sand should I use under pavers?
Use coarse, washed sand for bedding, and polymeric sand for filling joints to improve stability and prevent weed growth.
Do I need to compact the base before laying pavers?
Yes, compacting the base prevents shifting and sinking, ensuring a long-lasting, even surface.
Should I use edging for my paver project?
Yes, edging keeps the pavers in place and prevents spreading over time, improving the durability of the installation.