How to build stairs with paver stones begins with understanding why they are a popular choice for outdoor landscaping. Paver stairs not only add a stylish and natural look to your yard but also offer strong durability that can withstand weather and heavy use. Using pavers for steps creates a clean, polished appearance that enhances the overall look of your home and increases property value.
Building with paver stones allows for flexibility in design, offering various colors, shapes, and textures to match your outdoor space. While some homeowners choose the DIY route to save money and enjoy a hands-on project, others prefer hiring a professional to ensure safety, proper drainage, and long-term stability. Either way, paver stairs are a great investment that blends function with beauty.
Planning Your Paver Stone Stairs

Creating paver stone stairs is a great way to boost the look and safety of your outdoor space. Before starting, it’s important to plan properly. Here’s a simple guide to help you get started:
1. Evaluate the Slope and Terrain
Start by checking the slope of the area where you want to build the stairs. If the hill is too steep or uneven, you may need to level the ground or add support. A smooth, stable base is key to making long-lasting and safe stairs.
2. Measure Stair Dimensions (Rise/Run)
Next, measure how high (rise) and how deep (run) each step will be. A comfortable step usually has a rise of 6 to 7 inches and a run of about 12 inches. Accurate measurements help ensure the steps are easy to walk on and look good too.
3. Check Local Building Codes and Permits
Before starting the work, look into your local building codes. Some areas require a permit to build outdoor stairs. These rules help make sure your project is safe and up to standard.
4. Tools & Equipment Checklist
Gather everything you need before beginning. Here’s a basic list:
- Measuring tape
- Shovel and level
- Gravel and sand for the base
- Rubber mallet
- Concrete adhesive (if needed)
- Paver stones
- Safety gear (gloves, goggles)
Choosing the right pavers for steps is important too. Some materials provide better grip and durability than others. Look for paver steps ideas online or at your local landscaping store to get inspiration and see what styles suit your space.
You may read Are Concrete Paver Good For Patio.
Material Options for Paver Steps
When planning your outdoor stairs, choosing the right material is just as important as the design. There are several great paver steps ideas to consider based on your style, budget, and the look you want to achieve. Below are some popular options for pavers for steps, along with their pros and cons:
1. Concrete Pavers
Pros:
- Affordable and widely available
- Easy to install and replace
- Comes in many shapes, colors, and textures
Cons:
- Can fade over time in direct sunlight
- May crack in extreme weather if not installed properly
Concrete pavers are a top choice for many homeowners because they offer flexibility in design and are easy to work with.
2. Natural Stone (Bluestone, Flagstone, etc.)
Pros:
- Beautiful, timeless look
- Very strong and long-lasting
- Adds natural charm to any landscape
Cons:
- More expensive than other options
- Heavier and harder to install
- May need sealing to prevent staining
If you’re going for a high-end or rustic look, natural stone is one of the best paver steps ideas to explore.
3. Brick-Style Pavers
Pros:
- Classic and traditional appearance
- Durable and weather-resistant
- Easy to maintain
Cons:
- Limited color range (mostly red and brown tones)
- Can be slippery when wet unless textured
Brick-style pavers for steps are great if you’re aiming for a charming, old-world feel.
4. Treads, Risers, and Coping Stones
These are special pieces used to finish off your steps:
- Treads are the flat parts you step on.
- Risers are the vertical parts between each step.
- Coping stones are used to cap off stair edges for a smooth, finished look.
They come in all the materials mentioned above and help tie your whole stair design together.
Step-by-Step Guide | How to Build Stairs with Paver Stones

Building paver stairs adds both function and beauty to your outdoor space. Whether you’re working on a sloped yard, garden, or patio, the right steps can make your space safer and more attractive. Here’s a simple guide to help you with creating steps with pavers:
Step 1: Design & Layout Planning
Start by deciding how many steps you need and where they’ll go. Measure the rise (total height) and run (total length) to calculate the number of steps and size of each. Look at paver steps ideas online or in landscaping catalogs for inspiration on style and layout.
Tip: A comfortable stair usually has a rise of 6–7 inches and a run of about 12 inches.
Step 2: Excavation & Base Preparation
Mark your stair layout and begin digging. You’ll need to dig deep enough for the gravel base, sand layer, and pavers.
Be sure to create a level and stable foundation.
Importance of Proper Drainage:
Good drainage keeps your paver stairs from shifting or cracking. Slope the base slightly away from your home and add crushed gravel to help water flow away.
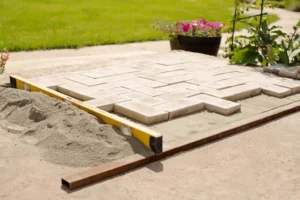
Step 3: Installing the Base Layer (Gravel & Sand)
Lay about 4–6 inches of crushed gravel and compact it well. Then add 1 inch of coarse sand and level it out.
This base provides a strong, stable foundation for creating steps with pavers and prevents future sinking or movement.
Step 4: Building Step Frames (Using Blocks or Stone Risers)
Use stone blocks, concrete blocks, or pre-cut stone risers to form the front and sides of each step. Make sure each step is level before moving on to the next one.
Tip: Dry-fit the blocks first to see how they line up before securing them.
Step 5: Placing Pavers and Treads
Now it’s time to place your chosen paver stones on the step treads. Whether you go with concrete, natural stone, or brick-style, align them neatly and press them firmly into place.
Explore different paver steps ideas to choose patterns and colors that match your overall outdoor design.
Step 6: Compacting and Finishing Touches
Once your steps are built, go over them with a hand tamper or plate compactor to secure everything in place.
Optional but recommended finishing touches include:
- Sealing: Protects your pavers from stains and weather damage.
- Edge Restraints: Keeps the sides of the stairs from shifting over time.
- Landscape Accents: Add low plants, lighting, or garden stones around your stairs to enhance their look.
Creating outdoor steps with pavers is a rewarding way to elevate both the aesthetics and functionality of your landscape. At Lakota Design Group, we specialize in paver installation services in the Bay Area, bringing your vision to life with precision and style. Whether you’re going for a modern, rustic, or classic look, we offer a wide range of paver step design ideas tailored to your outdoor space. Proper planning and professional base preparation are essential for durable, beautiful paver stairs—and that’s where we come in. Ready to upgrade your outdoor space? Contact Lakota Design Group today for expert paver installation in the Bay Area!
When to Hire a Professional – Trust Lakota Design Group
Hiring a professional for your paver installation project in the Bay Area can make all the difference—especially in the following situations:
- Complex Terrain or Design
Uneven ground, slopes, or intricate layouts require expert planning and execution. Our team at Lakota Design Group ensures every detail is handled with precision. - Time-Saving Benefits
DIY projects often take longer than expected. With Lakota Design Group, you’ll save valuable time and avoid costly mistakes, getting the job done right the first time. - Long-Lasting Results
Professional-grade materials and installation techniques mean your paver steps and walkways will stand the test of time, with minimal maintenance.
Let Lakota Design Group handle your next outdoor upgrade—Contact us today for expert paver installation services in the Bay Area!
FAQs
Q1: What Materials Do I Need To Build Stairs With Paver Stones?
A: You’ll need paver stones, gravel or crushed stone for the base, sand for leveling, landscape fabric to prevent weed growth, a compactor, a rubber mallet, a level, and edging restraints to keep the stones in place.
Q2: How Do I Prepare The Ground Before Installing Paver Stairs?
A: Start by clearing the area of debris and vegetation. Excavate the soil to the required depth, then lay landscape fabric. Next, add a layer of gravel or crushed stone and compact it firmly to create a stable base.
Q3: How Do I Ensure My Paver Stairs Are Level And Stable?
A: Use a level frequently during installation to check the evenness of each step. Proper base preparation with compacted gravel and sand is key to stability. Edging restraints help keep the stones from shifting over time.
Q4: Can I Build Paver Stairs On A Slope Or Uneven Terrain?
A: Yes, but it requires careful planning. You may need to build retaining walls or use step risers to manage height differences and ensure safety. Professional help can make complex terrains easier to handle.
Q5: How Long Does It Take To Build Stairs With Paver Stones?
A: The timeline depends on the size and complexity of the stairs, your experience level, and the materials used. A simple stair project might take a couple of days, while more intricate designs may take longer.