Author name: admin

How to Get Rid of Weeds Between Pavers | Easy Steps
Uncategorized

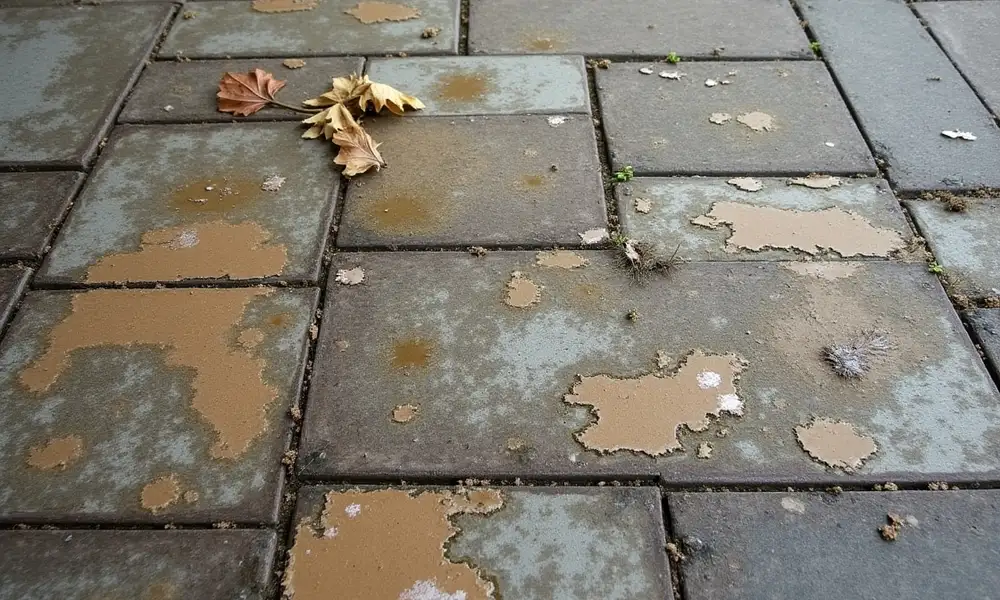
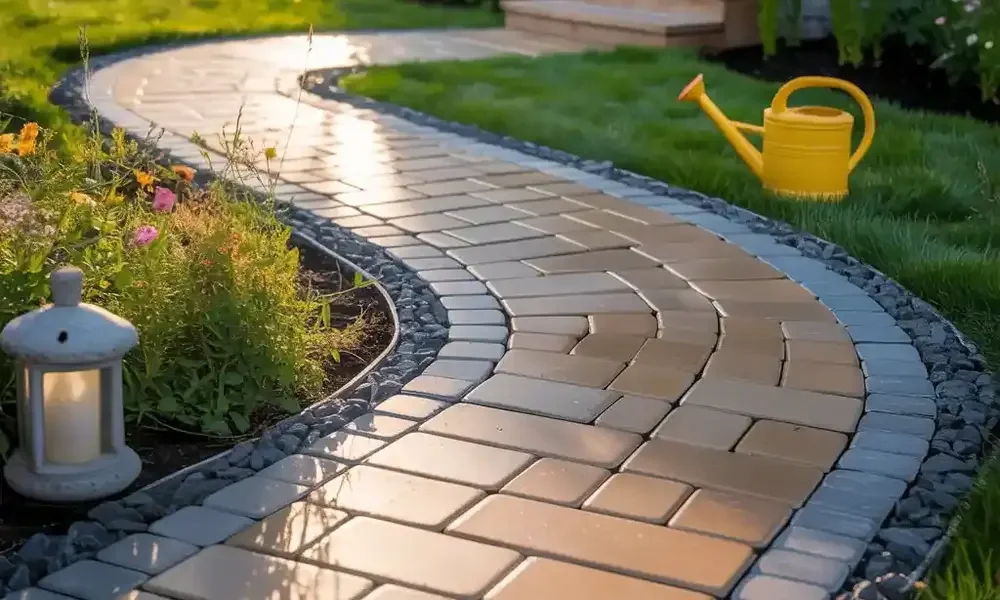
How To Get Rid Of Weeds Between Pavers Permanently

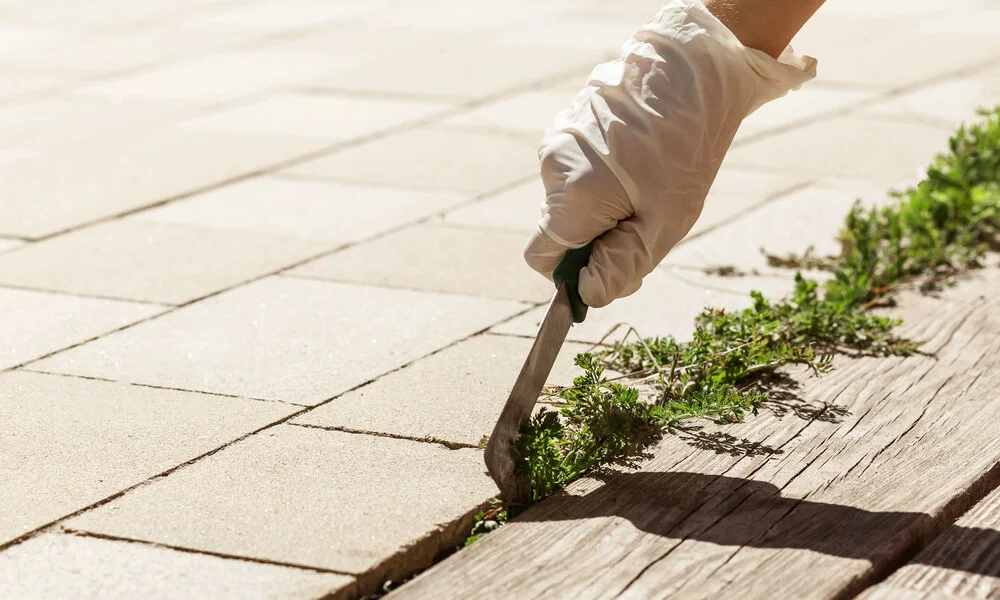
How to get rid of weeds between pavers starts with understanding that it takes more than just pulling them out. Weeds between pavers can make your patio, walkway, or driveway look messy and if left unchecked, they can even shift or damage the pavers over time. To stop them permanently, you’ll need a method that prevents regrowth, not just a quick fix. You can use natural solutions like vinegar, boiling water, or baking soda for an eco-friendly approach, or opt for commercial weed killers for stronger results. No matter which method you choose, the key to keeping pavers weed-free long term is regular maintenance and sealing the gaps to block future growth.Why Are Weeds Growing Through My Pavers? Weeds growing between pavers is a common problem that many homeowners face, and understanding the root cause is the first step in preventing it. Here are the most common reasons: Poorly Installed Pavers or Lack of Polymeric Sand If your pavers were not installed properly or if the joints between them weren’t filled with polymeric sand, gaps are left behind where weeds can easily take root. Polymeric sand hardens when wet, creating a seal that helps remove weeds from pavers and prevent future growth. Soil and Moisture Buildup Over time, wind and rain can deposit soil and organic debris between the pavers. Combined with moisture, this creates a fertile environment for weeds growing between pavers. Seeds Blown in by Wind or Dropped by Birds Even if the surface looks clean, weed seeds can be carried by the wind or birds and settle in the gaps between pavers. When sufficient dirt or debris is present, they sprout rapidly. Prevention Tips: Use polymeric sand during installation or when re-sealing. Regularly clean paver joints to prevent soil buildup. Apply a natural or chemical weed inhibitor after cleaning. Remove weeds from pavers regularly to keep your patio or walkway looking clean and weed-free. Prevention starts with understanding why weeds are growing in the first place—and now, you do.You can also read about paver installation in Bay Area.How to Get Rid of Weeds Between Pavers Permanently Weeds growing between pavers can quickly ruin the look of your patio, driveway, or walkway. If you’re tired of them popping up again and again, here’s how to get rid of weeds between pavers permanently and keep your outdoor space looking sharp.A. Manual Weed Removal Methods (Quick Fixes That Still Help)While not a long-term solution on their own, manual methods are a good starting point for clearing weeds between pavers: Hand Pulling with a Weeding Tool Pulling weeds by hand is effective, especially when you remove the roots. Using a tool helps you work faster and more precisely. Power Washing A pressure washer can remove weeds and debris from paver joints. Use it carefully to avoid loosening the pavers or washing out the joint sand. Flame Weeding (Use Cautiously) A flame weeder kills weeds with heat. It’s effective but must be used with extreme caution. Follow local fire safety regulations and avoid use near dry vegetation or flammable materials. B. Chemical Options for Stubborn Weed ProblemsIf manual methods aren’t enough, chemical treatments can help eliminate weeds more thoroughly: Weed Killers Products with glyphosate are powerful but may raise environmental concerns. Consider eco-friendly alternatives like vinegar- or salt-based herbicides for a safer approach. Safe Application Tips Always spray on a dry, calm day. Follow the product instructions, avoid overspray, and wear protective gear like gloves and safety glasses. C. Long-Term Solutions to Prevent Weed RegrowthGetting rid of weeds is only half the job keeping them from coming back is the real goal. Here’s how to stop future growth between pavers: Use Polymeric Sand in Joints Replacing regular joint sand with polymeric sand helps block weed seeds. Once hardened, it forms a tight barrier that’s tough for weeds to break through. Seal Your Pavers Applying a paver sealer protects the surface and joints, making it harder for weeds to take hold and easier to clean. Install a Weed Barrier During Construction If you’re laying new pavers, install landscape fabric underneath the base material. This acts as a physical barrier to weed growth from below. Ensure Proper Drainage Poor drainage can lead to weed-prone damp areas. Make sure your paved surface has the right slope to let water drain away efficiently. Routine Maintenance Sweep regularly, clear away leaves and debris, and inspect the joints. Just a little upkeep each month can help keep your pavers weed-free long-term. How to Naturally Kill Weeds Between Pavers If you want to get rid of weeds between pavers without using harsh chemicals, there are safe, natural methods that are both effective and eco-friendly. Here’s how to tackle unwanted growth using household items you likely already have on hand.A. Natural DIY Weed RemediesThese simple, non-toxic options can help eliminate weeds between pavers without harming kids, pets, or nearby plants: Vinegar and Salt Spray Mix white vinegar with table salt and a few drops of dish soap. Spray the solution directly onto the weeds. The vinegar dries out the plant, and the salt prevents it from coming back. Just be careful—this mixture can also affect surrounding soil and vegetation. Boiling Water Pouring boiling water directly over weeds is a fast and natural way to kill them. The heat destroys the plant tissue instantly. While effective on contact, deep roots may need multiple applications. Baking Soda Sprinkle baking soda into the cracks between your pavers. It dries out the weeds and alters the soil’s pH, making it harder for new ones to grow. For best results, apply during sunny, dry conditions. B. Benefits and Drawbacks of Natural Weed ControlAdvantages: Safe for children, pets, and nearby plants Environmentally friendly and chemical-free Affordable and easy to prepare Limitations: May require repeated use for stubborn or deep-rooted weeds Slower results compared to commercial herbicides Maintenance Tips to Keep Pavers Weed-Free Once you’ve taken steps to remove weeds from pavers, regular maintenance is essential to keep them from coming back. Here are simple yet

How to Remove Oil Stains from Pavers In 6 Easy Steps
Uncategorized

How To Remove Oil Stains From Pavers

How to remove oil stains from pavers is a common concern for homeowners and property managers alike. Oil stains are often caused by leaky vehicles, lawn equipment, or accidental spills, making them a frequent issue on driveways, patios, and walkways. These unsightly marks not only detract from the overall appearance of your outdoor space but can also lead to long-term damage if left untreated. Keeping your pavers clean is essential—not just for curb appeal, but also to extend their lifespan and prevent surface deterioration. Whether you’re trying to clean up oil stain on driveway surfaces or tackling the challenge of cleaning stained pavers, this guide will walk you through 6 easy steps to get the job done. Plus, we’ll share additional tips to make sure your pavers stay spotless and well-maintained.Common Types of Stains on Paving Stones and How to Clean Them Paving stones can enhance the look of any outdoor space, but over time, they’re prone to a variety of stains that can diminish their appearance. Knowing the type of stain and using the correct cleaning method is key to preserving the look and longevity of your paving stones.1. Oil StainsMotor oil and cooking oil are common culprits, especially on driveways and outdoor kitchens. These stains are difficult to remove because they might seep through the stone’s porous surface.Tip for getting oil stains out of driveway: Use an absorbent material like cat litter to soak up fresh spills. For older stains, a degreasing agent or a specialized oil remover designed for paving stones works best.2. Rust StainsWater drainage from corroded fixtures or metal patio furniture and barbecues can cause rust.Cleaning tip: Apply a rust remover that’s safe for use on stone surfaces—avoid acidic cleaners that may etch or discolor the stone.3. Mold & MildewThese produce unattractive green or black stains because they grow best in regions that are shaded or continuously moist.Cleaning tip: Make use of a mold and mildew cleaning or a water and mild bleach solution. Use a brush to gently scrub, then rinse well.4. EfflorescenceThis white, chalky residue is caused by water-soluble salts rising to the surface.Cleaning tip: A stiff brush and water can remove light deposits. For stubborn cases, use a commercial efflorescence cleaner specifically formulated for pavers.5. Paint & Grease StainsPaint drips or food grease from barbecues can leave noticeable marks.Cleaning tip: Use a paint remover that won’t damage stone. For grease, a degreaser or poultice can draw out deep-set stains.You can also read about paver installation in Bay Area.Why Oil Stains Are Tough to Remove from Paving Stones Oil stains are among the most stubborn and unsightly marks that can appear on paving stones, especially on driveways and outdoor cooking areas. The reason they’re so difficult to remove lies in the nature of both the oil and the paver surface.Paving stones are naturally porous, meaning they have tiny holes and channels that can easily absorb liquids. Oil that spills doesn’t simply remain on the surface; instead, it penetrates deeply into these pores and forms a bond with the stone beneath the top layer.It becomes more difficult to remove using conventional cleaning techniques the longer the oil remains since it penetrates and solidifies more. Over time, the stain can darken and spread, especially in warmer weather, where heat can cause the oil to flow further into the stone.This is why getting oil stains out of driveway pavers requires prompt attention and often a combination of absorbents and heavy-duty degreasers. Acting quickly and using the right cleaning products can make a significant difference in how effectively the stain is removed.How to Remove Oil Stains from Pavers in 6 Easy Steps Oil spills on pavers—whether from leaky vehicles, grills, or outdoor equipment—can leave unsightly stains that are difficult to ignore. Because paving stones are porous, oil can seep in quickly and become tough to lift. Here’s how to remove oil stains from driveways, clean up road surfaces, and maintain the finest possible appearance for your outdoor spaces.Step 1: Blot Up Excess OilIf the oil spill is fresh, act immediately. Use paper towels, an old rag, or even sawdust or kitty litter to absorb as much oil as possible before it penetrates the surface. Gently press down; avoid rubbing as this may cause the discoloration to spread. Quick action here makes the rest of the cleaning process far easier.Step 2: Apply an Absorbent Cleaning AgentOnce you’ve blotted up the excess oil, cover the stained area with an absorbent powder such as baking soda, cornstarch, or a commercial oil stain remover. These materials help draw out the oil from the small pores in the paver. For commercial cleaners, make sure the product is specifically formulated to remove oil stains from driveway or stone surfaces.Step 3: Scrub the Area GentlyUsing a stiff (but non-metal) brush, gently scrub the cleaning agent into the surface. The goal is to push the cleaner into the pores of the paver without damaging it. If you’re cleaning stained pavers made of concrete or natural stone, avoid wire brushes, which can cause scratches.Step 4: Let It SitLet the cleaning agent sit on the stain for 15 to 30 minutes—longer for older or deeper stains. This dwell time allows the cleaner to break down and absorb the embedded oil. For stubborn stains, some commercial removers may recommend leaving the product overnight—check the label instructions.Step 5: Rinse ThoroughlyUse a garden hose with a spray nozzle to rinse the area thoroughly. If needed, a pressure washer on a low to medium setting can help remove any lingering residue—but be cautious not to blast away the joint sand between pavers or damage the surface. This step is essential when you’re trying to clean up oil stain on driveway areas with heavy accumulation.Step 6: Repeat if NecessarySome stains—especially old or untreated ones—may require multiple treatments. Don’t be discouraged. Reapply your chosen cleaner or try a stronger solution until the stain fades. Patience and repetition are key to fully remove oil stains from driveway surfaces.You can also read about Five

How Much Is Lawn Care Per Month? Costs Explained in 2025
Uncategorized

How Much Is Lawn Care Per Month

How much is lawn care per month? For many homeowners, maintaining a healthy, green lawn is both a point of pride and a practical necessity. A well-kept lawn enhances curb appeal, supports property value, and provides a pleasant outdoor space for relaxation or gatherings. But keeping your lawn in top shape requires ongoing attention—and budgeting. Understanding monthly lawn care costs is essential for planning and avoiding surprises, especially as expenses can vary widely depending on your location, the size of your yard, and the specific services you need. FFor instance, because of local labor costs and environmental factors, the cost of lawn care services in the Bay Area may be much higher than the national average. Additionally, unexpected issues such as damaged patches or pest infestations can drive up your lawn repair cost, making it even more important to be informed and prepared.Average Cost of Lawn Care Per Month The size, location, and quality of service of your lawn can all have a significant impact on the average monthly cost of lawn care. On a national level, homeowners typically spend between $50 to $250 per month for lawn maintenance. This range spans from basic mowing services to full-service lawn care packages that include fertilization, weed control, and aeration.National Monthly Averages: Basic Lawn Mowing: $50 – $100/month Mid-Tier Services (Mowing + Edging/Trimming): $100 – $150/month Full-Service Lawn Care (Fertilization, Weed Control, Pest Treatment): $150 – $250/month Cost by Service Frequency Service Frequency Typical Monthly Cost Details Weekly $150 – $250 Ideal for fast-growing lawns, includes regular mowing and trimming. Biweekly $80 – $150 Common for standard lawn upkeep in moderate climates. Monthly $50 – $100 Suitable for low-maintenance lawns or drought-tolerant yards. Tips for Finding Affordable Lawn Care Services Bundle services like mowing, edging, and fertilizing for better monthly rates. Get multiple quotes from local providers to compare the best prices. Consider seasonal contracts for affordable lawn care services with consistent pricing. Ask about discounts for seniors, veterans, or paying for multiple months upfront. You can also learn about How To Care For Bermuda Grass Lawn.Factors That Impact Lawn Care Costs Understanding what drives the cost of maintaining your lawn can help you make informed decisions and find affordable lawn care services that fit your needs. The following are the main determinants of lawn care service costs:1. Size of the Lawn Cost Impact: High More time, effort, and equipment are needed to maintain larger lawns. Example: A quarter-acre lawn may cost ~$60/month for mowing, while a full acre could exceed $150/month. 2. Type of Grass and Landscaping Cost Impact: Medium to High Bermuda and Zoysia grasses, for example, require regular fertilization and mowing. Complex landscaping (flower beds, slopes, hardscapes) increases labor time and complexity. 3. Frequency of Service Cost Impact: Medium Weekly services are more expensive than biweekly or monthly. Regular maintenance may reduce the need for costly lawn repair costs over time. 4. Types of Services Included Cost Impact: High Basic services: mowing, edging, and trimming. Full-service packages may include: Fertilization Weed & pest control Aeration & dethatching Irrigation maintenance The cost of lawn care services increases with the extent of the plan. 5. Location-Specific Pricing (Bay Area Example) Cost Impact: Very High in urban and high-cost regions. In the San Francisco Bay Area, expect to pay 20–40% more than the national average due to: Higher labor costs Increased overhead for local businesses Strict environmental regulations 6. Seasonal Variations & Weather Conditions Cost Impact: Medium More frequent fertilization and mowing are needed in the spring and summer. Harsh winters may reduce mowing but increase lawn repair costs in spring due to snow mold or damage. Lawn Care Cost Impact Chart Factor Cost Impact Details Lawn Size High Larger areas = more time and labor. Grass & Landscaping Type Medium–High Demanding lawns require specialized care. Frequency of Service Medium Weekly > Biweekly > Monthly. Types of Services Included High Full-service = more comprehensive = higher cost. Location (e.g., Bay Area) Very High Expect up to 40% higher than national average. Seasonal & Weather Conditions Medium Summer peaks in cost; winter often lower unless repairs arise. You should read about What Happens to Your Lawn During Cold Weather?Lawn Care Services Include 1. Basic Lawn Care ServicesThese are the core services typically included in any entry-level lawn care package. Mowing: Cutting grass to a consistent height. Edging: Establishing neat lines for flower beds, sidewalks, and roads. Blowing: Clearing grass clippings and debris from paved areas. Ideal for low-maintenance lawns or budget-friendly plans looking for truly affordable lawn care services.2. Intermediate Lawn Care ServicesThese go beyond mowing to maintain the beauty and health of the lawn. Fertilization: Promotes strong root growth and lush green lawns. Weed Control: Prevents or removes invasive species that can harm grass. Often bundled into seasonal packages. A cost-effective step up in lawn care service pricing for healthier lawns.3. Full-Service Lawn Care PackagesDesigned for maximum lawn health and aesthetics, these services address deep-rooted issues and long-term care. Aeration: To enhance the absorption of water and nutrients, holes are punched into compacted soil. Seeding/Overseeding: Adds new grass to bare or thinning areas. Pest Control: Treats for grubs, ticks, ants, and other lawn-damaging pests. Irrigation System Maintenance: Checks and repairs sprinkler heads and water timing systems. Higher-end plans that help avoid expensive lawn repair costs by proactively maintaining soil and turf health.4. Optional Lawn Care Add-OnsThese are typically offered à la carte or as seasonal extras. Shrub Trimming: Maintains hedges and decorative bushes. Leaf Cleanup: Removes fallen leaves in autumn to prevent lawn suffocation. Seasonal Flower Planting: Adds curb appeal with annuals and perennials. Great for customizing your package without committing to full-service pricing.Summary Service Level Included Services Best For Basic Mowing, edging, blowing General upkeep, small or low-maintenance lawns Intermediate Fertilization, weed control Healthy lawn growth and seasonal health management Full-Service Aeration, seeding, pest control, irrigation maintenance Comprehensive care and long-term lawn improvement Optional Add-Ons Shrub trimming, leaf cleanup, seasonal flower planting Customization, seasonal aesthetics, detailed care How Much Is

How to Care for Bermuda Grass Lawn | Easy Maintenance Tips
Uncategorized

How To Care For Bermuda Grass Lawn

How to care for Bermuda grass lawn starts with understanding the unique needs of this warm-season turf. Known for its dense, green growth and exceptional heat tolerance, Bermuda grass is a favorite choice for lawns in southern regions and other warm climates. However, regular and knowledgeable maintenance is necessary to maintain its health and vitality.Proper Bermuda lawn care not only enhances the appearance of your yard but also improves its durability against foot traffic and pests. A well-structured Bermuda lawn calendar is key to ensuring timely maintenance tasks throughout the year. In this guide, we’ll cover everything you need to know, including seasonal care tips, simple maintenance steps, repair strategies, and effective management techniques to help your Bermuda grass thrive year-round.Understanding Bermuda Grass Characteristics of Bermuda GrassBermuda grass is a warm-season turfgrass known for its dense growth, fine texture, and bright green color. Its resilience and quick growth rate make it a popular choice for athletic fields, golf courses, and residential lawns.  Bermuda grass spreads through both rhizomes (underground stems) and stolons (above-ground runners), allowing it to quickly cover bare spots and recover from wear.Key characteristics: Grows aggressively in warm climates Tolerates heavy foot traffic Goes dormant and turns brown in cooler temperatures Requires regular maintenance to stay healthy and controlled Ideal Growing ConditionsTo thrive, Bermuda grass needs the following conditions: Sunlight: Needs at least 6 to 8 hours of full light each day. In locations that are shadowed, it performs poorly. Soil Type: Prefers well-drained, sandy or loamy soils with a pH between 5.8 and 7.0. Watering Needs: Needs 1 to 1.25 inches of water per week, either from rainfall or irrigation. Deeper root systems are encouraged by deep, infrequent watering. Following a bermudagrass calendar is essential for timing key care activities like fertilizing, mowing, aeration, and overseeding. Adjustments should be made based on your specific climate and lawn needs.Benefits of Bermuda Grass Lawns Hardiness: Stands up well to heat, drought, and foot traffic. Quick Recovery: Repairs itself rapidly due to aggressive growth. Dense Turf: Helps crowd out weeds naturally. Low Water Requirement (once established): Efficient at using water compared to cool-season grasses. Challenges of Bermuda Grass Lawns High Maintenance: Needs frequent mowing, fertilization, and edging. Dormancy in Cold: Turns brown in fall and winter unless overseeded with a cool-season grass. Invasiveness: Can spread into garden beds and neighboring lawns if not properly bordered. Poor Shade Tolerance: Struggles in areas with significant tree or building shade. Effective bermuda lawn care involves regular mowing (1–2 inches height), seasonal fertilization, weed control, and following a well-structured maintenance calendar. Aeration in the spring and dethatching, when needed, can also improve turf health.You should read about Commercial Lawn Care Services in the Bay Area.7 Easy Steps of How to Care for Bermuda Grass Lawn Maintaining a lush and healthy Bermuda grass lawn requires consistent attention and seasonal adjustments. Follow these 7 easy steps to master bermuda lawn care and keep your yard looking its best year-round.1. Mowing Recommended Height: Keep Bermuda grass mowed to 1–2 inches in height. This helps promote dense growth and prevents weed establishment. Frequency: During the peak growing season (late spring through summer), mow 1–2 times per week depending on growth rate. Sticking to a bermuda lawn calendar helps ensure you’re mowing at the right intervals throughout the season. 2. Watering Watering Deeply and Infrequently: Water deeply (about 1 to 1.25 inches per week) as opposed to often and lightly. This promotes deep root growth, improving drought tolerance. Morning Watering: Drink water first thing in the morning to lower the risk of sickness and evaporation. As part of proper bermuda lawn maintenance, adjust watering based on rainfall and seasonal temperature.3. Fertilizing Fertilizer Type: Use a nitrogen-rich fertilizer specifically designed for warm-season grasses. Schedule: When the grass is completely green in late spring, start fertilizing. Throughout the summer, do it every four to six weeks. Your bermuda lawn calendar should include fertilization in May, June, August, and possibly September depending on climate. 4. Weed Control Pre-Emergent: Apply pre-emergent herbicides in early spring and again in fall to prevent weeds like crabgrass. Post-Emergent: Use targeted treatments for existing weeds during the growing season. Avoid spraying during periods of drought or high heat. Effective bermuda lawn care includes staying ahead of weed growth before it spreads.5. Aeration When to Aerate: Perform core aeration in late spring or early summer, once the lawn is actively growing. Why It Matters: Aeration relieves soil compaction, improves air and water movement to the roots, and enhances fertilizer effectiveness. Regular aeration is an important part of bermuda lawn maintenance, especially for high-traffic areas.6. Thatch Removal What is Thatch? Thatch is a layer of dead grass and roots that builds up between the soil and the green growth. How to Remove: Use a dethatching rake, vertical mower, or power rake to remove excessive thatch in late spring. This step should be part of your bermuda lawn calendar every 1–2 years as needed. 7. Overseeding When to Overseed: When soil temperatures rise over 65°F in late spring or early summer, overseed with Bermuda or a suitable grass variety. How to Do It: Mow low, dethatch, aerate, then spread seed evenly and water lightly but frequently until germination. Overseeding enhances density and helps fill in bare patches—an essential step for a vibrant bermuda lawn care routine.You can read about How Much Lawn Care Cost.Bermudagrass Lawn Maintenance Calendar SPRING (March – May)What to Do: Scalp the Lawn (early spring): Lower mower height to remove dormant grass and encourage new growth. Pre-Emergent Weed Control: Apply by mid-March to prevent crabgrass and other weeds. Fertilization: Start applying nitrogen fertilizer when lawn fully greens up (usually April). Mowing: Set mower to 1–1.5 inches; mow weekly as growth increases. Aeration: Core aerate in late spring if soil is compacted. Overseeding (if needed): Late spring is the best time for overseeding Bermuda grass. What to Avoid: Avoid fertilizing too early when grass is still dormant. Avoid heavy watering before consistent warm temperatures arrive. SUMMER (June

How Much Lawn Care Cost in 2025 | Pricing Guide
Uncategorized

How Much Lawn Care Cost

How much lawn care cost is a common question for homeowners aiming to maintain a healthy, attractive yard. Proper lawn care plays a vital role in enhancing curb appeal, supporting a healthy environment, and increasing property value. Understanding how much lawn care cost can help you budget effectively and choose the right services for your needs. Whether you’re hiring a professional for routine lawn mowing or investing in more comprehensive treatments, it’s important to know that prices can vary widely. Factors such as yard size, service frequency, location, and specific tasks—like fertilization, weed control, or aeration—all influence overall lawn care cost. In the next sections, we’ll break down these elements in more detail, including typical lawn mowing cost and what you can expect from different types of lawn care services.How Much Lawn Care Cost Lawn care prices can vary widely depending on the size of your yard, the type of service, and your location. On average, homeowners can expect to pay between $30 to $80 per visit for basic lawn mowing services.Factors Affecting the Price of Lawn Care ServiceSeveral things can influence the price of lawn care service: Lawn size: Larger lawns naturally cost more.   Frequency: Weekly or biweekly services may be cheaper per visit than one-time jobs.   Type of service: Mowing, edging, fertilizing, weed control, and aeration all come at different price points.   Region: Costs tend to be higher in urban or high-cost-of-living areas.   Breakdown of Common Lawn Care Prices Service Type Average Cost Lawn mowing $30 – $80 per visit Fertilization $50 – $100 per application Weed control $40 – $90 per treatment Aeration $70 – $150 per visit Leaf removal $50 – $100 per session Bundled Lawn Care Service CostsSome companies offer seasonal or annual packages that include a combination of services. The price of lawn care service bundles can range from $250 to $750+ per season, depending on services included and lawn size.You can also read about How to Get Rid of Moss on Your Lawn.Average Lawn Care Prices in the Bay Area In the Bay Area, the price of lawn care service tends to be higher than the national average due to the region’s high cost of living and labor. Homeowners typically pay more for routine maintenance and specialty lawn services.Typical Lawn Care Services and Their Price RangesHere’s a breakdown of common services and their average lawn care cost in the Bay Area: Service Average Price in Bay Area Lawn mowing $50 – $100 per visit Fertilizing $70 – $120 per application Weed control $60 – $110 per treatment Aeration $90 – $160 per visit Leaf cleanup $75 – $150 per session Seasonal packages $400 – $900+ per season These prices can vary based on lawn size, terrain, and frequency of service.Bay Area vs. National Lawn Care CostCompared to the national average, the lawn care cost in the Bay Area is generally 20–40% higher. For example: National average for mowing: $30–$80 Bay Area average: $50–$100 This increase is mainly due to higher labor costs, equipment expenses, and property sizes in urban and suburban parts of the Bay Area.What Factors Influence Lawn Care Prices? The lawn care prices you’ll pay can vary significantly depending on several important factors. Whether you’re hiring for a simple mow or full-service lawn management, here’s what affects the cost:1. Size of the LawnThe most obvious factor is the size of your yard. Small yards (under 1/4 acre) have lower service charges. Larger properties require more time, fuel, and labor, driving up the lawn mowing cost and overall service fees. 2. Frequency of ServiceHow often you need service directly impacts lawn care prices: One-time visits tend to be more expensive per job. Weekly or monthly maintenance often comes with discounted rates, offering better value long-term. 3. Type of Service RequiredDifferent services come with different pricing structures: Lawn mowing cost is typically the base rate. Additional services like edging, aeration, fertilizing, and pest control each add to the total lawn care prices. For example, adding aeration to a mowing visit may increase the total by $70–$150.4. SeasonalitySpring and summer are peak seasons, which can cause a spike in lawn care prices due to high demand. Off-season work, such as leaf removal or winter lawn prep, may come at lower rates or package discounts.5. Equipment and Labor CostsThe cost of fuel, maintenance of professional-grade equipment, and local labor rates all contribute to the lawn mowing cost. Areas with higher wages or stricter regulations typically see higher service prices.6. Local Competition and Company ReputationIf you’re in an area with many lawn care providers, competitive pricing may keep lawn care prices reasonable. On the other hand, highly rated or well-established companies may charge a premium for trusted service and reliability.You should read about What Happens to Your Lawn During Cold Weather?Lawn Care Cost by Service Type Understanding individual service pricing helps you estimate your overall lawn care budget. Below is a breakdown of average lawn care cost by service type in the U.S.1. Lawn Mowing National Average: $30 – $80 per visit Pricing Factors: Lawn size, terrain, grass height, and frequency Regular mowing is often offered as a weekly or biweekly service. 2. Fertilization National Average: $50 – $100 per application Annual Programs: $250 – $500 for multiple treatments Fertilizer type (organic vs. synthetic) and number of treatments per season affect cost. 3. Weed Control National Average: $40 – $90 per treatment Often bundled with fertilization for seasonal packages Spot treatments and pre-emergent applications can increase pricing. 4. Aeration National Average: $70 – $150 per visit Recommended once or twice a year to reduce soil compaction and improve root growth Core aeration costs more than spike aeration. 5. Dethatching National Average: $100 – $250 per service Cost depends on lawn size and thatch severity Often paired with aeration for best results. 6. Leaf Removal National Average: $50 – $100 per visit Heavily affected by lot size and volume of leaves May be charged hourly or per bag of debris removed. 7. Mulching

How to Install Paver Walkway | A Step-by-Step Guide
Uncategorized

How To Install Paver Walkway

How to install paver walkway is a common question for homeowners looking to enhance their outdoor space. A paver walkway is a path made from interlocking stones such as brick, concrete, or natural stone, offering both function and aesthetic appeal. Installing paver walkway improves curb appeal, adds property value, and creates a clean, durable surface for walking. It’s a low-maintenance solution that works well in gardens, yards, and driveways. Everything from preparation and supplies to the detailed installation of a paver walkway will be covered in this guide. Whether you’re going DIY or hiring help, you’ll learn what’s involved in the process.Why Paver Walkways are Perfect for Your Home When it comes to enhancing your home’s exterior, few upgrades are as visually appealing and functional as a stone paver walkway. Whether leading guests to your front door or guiding you through a lush garden, paver walkways offer a timeless charm that blends beauty with practicality. They’re a great option for homeowners for the following reasons:1. Aesthetic Value and Curb AppealA well-designed stone paver walkway immediately improves the curb appeal of your house.. Available in a wide variety of colors, shapes, and textures, pavers can be arranged in patterns that complement your home’s style, whether modern, rustic, or traditional. This added visual appeal not only makes your property more inviting but also leaves a lasting impression on visitors and potential buyers.2. Durability and Low MaintenanceUnlike poured concrete or asphalt, paver walkways are known for their resilience. They can withstand heavy foot traffic, fluctuating weather, and ground movement without cracking. It is simple to replace individual pavers without affecting the remainder of the route if a piece is damaged. Routine maintenance involves basic cleaning and occasional re-sanding of joints—making paver sidewalk installation a smart, long-term investment.3. Eco-Friendliness and Drainage BenefitsWater can percolate through the joints in paver systems, which encourages natural drainage and lowers runoff. This feature helps prevent erosion and flooding, especially in areas prone to heavy rain. Choosing permeable pavers can also support sustainable landscaping goals and reduce your home’s environmental footprint.4. Customization Options and Increased Property ValueWith nearly limitless design possibilities, paver sidewalk installation gives you the freedom to create a walkway that reflects your personal style. You can mix and match colors, integrate borders, or include decorative inlays for a unique touch. In addition to enhancing aesthetics, a well-crafted stone paver walkway can significantly increase your home’s resale value by boosting both functionality and appearance.Ready to Upgrade Your Outdoor Space?If you’re considering a home improvement project that combines elegance, durability, and eco-conscious design, a paver sidewalk installation may be the perfect solution. Invest in a stone paver walkway today to enjoy long-lasting beauty and value.You can read about paver installation service in Bay area.How to Install Paver Walkway | Step-by-Step Guide A well-designed walkway not only adds beauty to your home but also improves accessibility and functionality. Whether you’re upgrading your front yard or adding charm to your garden path, installing a paver walkway is a rewarding DIY project. Follow this step-by-step guide to ensure a durable, professional-looking result.1. Planning and DesignBefore laying a paver walkway, careful planning is crucial. Measuring and marking the walkway: Outline your desired path using marking paint or a garden hose. Measure the length and width to calculate how many pavers you’ll need. Choosing paver style and pattern: Pick pavers that complement your home’s exterior. Running bond, basket weave, and herringbone are popular designs. 2. ExcavationProper excavation sets the foundation for a long-lasting paver sidewalk installation. How deep to dig: Typically, you’ll need to dig 6–8 inches deep—more if you live in a cold climate or plan to support heavy traffic. Tips for removing grass and soil: Use a sod cutter or flat shovel to remove grass. Make sure the trench’s bottom is level. 3. Laying the BaseThe base supports the weight of the pavers and prevents shifting over time. Adding and compacting gravel: Fill the excavated area with 4–6 inches of crushed stone or gravel. Compact it thoroughly using a plate compactor. Importance of proper base depth: A solid, well-compacted base is critical for a stable, long-lasting walkway. 4. Screeding the Sand LayerThe sand layer creates a smooth, level bed for the pavers. Spreading and leveling sand: Add 1 inch of bedding sand over the gravel base. Use a screed board to level the surface. Ensuring a smooth surface: Avoid walking on the sand after screeding to maintain a flat, even layer. 5. Installing the PaversNow the fun part—laying a paver walkway. Placing pavers in your desired pattern: Start at one end and work your way across, placing pavers snugly against each other in your chosen layout. Using a mallet and level for proper fit: Use a rubber mallet to tap each paver into position, and use a level to verify it often. 6. Cutting Pavers (if needed)Some pavers may need to be trimmed for a precise fit around curves or edges. Tools and techniques for shaping pavers: Use a masonry saw, chisel, or angle grinder. Always wear safety gear when cutting. 7. Securing the EdgesEdge restraints keep your walkway looking neat and prevent paver movement. Installing edge restraints to prevent shifting: Use plastic or metal edge restraints secured with spikes along the perimeter. 8. Compacting and SealingFinal touches ensure your walkway stays in place and looks great for years. Using a plate compactor: To settle the pavers into the sand base, run the compactor over the whole surface. Spreading sand over joints: Sweep jointing sand into the gaps between pavers, then compact again. Repeat until joints are full. Optional: sealing your paver walkway: Applying a sealant enhances color and protects against stains and weather damage. You can also read about How to Install a Paver Driveway.How to Build a Paver Walkway on a Slope Building a walkway on a slope may seem challenging, but with the right preparation and techniques, you can create a beautiful, stable path that resists erosion and drains properly. Whether your slope is gentle or steep,

Do You Tip Landscapers? Everything You Need to Know
Uncategorized

Do You Tip Landscapers

Do you tip landscapers after a job well done? It’s a question many homeowners ask when hiring professional help for their yard. Landscaping is hard, physical work that requires skill and effort, often performed in tough weather conditions. Recognizing this, some people believe tipping landscapers is a thoughtful way to show appreciation.While tipping isn’t always expected, offering a tip for landscaper services—especially for exceptional work—can go a long way. It reflects gratitude and encourages continued high-quality service. Whether it’s a one-time job or regular maintenance, showing thanks matters. So, should you tip? Let’s take a closer look.Do Landscapers Accept Tips? Yes, although it’s not often anticipated, landscapers frequently accept tips. Whether or not you should offer a landscaping tip can depend on several industry norms, the landscaper’s employment status, and regional practices.General Industry Norms for Tipping LandscapersIn the landscaping industry, tipping is appreciated but not always standard. A tip for lawn service or general landscaping work is more common when: The job is extensive or especially difficult The work exceeds your expectations It’s during a holiday season (especially for recurring services) A typical landscaping tip might range from $10 to $50, or 10–15% of the total bill for large projects. For regular lawn care, occasional tips or a holiday bonus are common.Independent Contractors vs. Employees of a Landscaping CompanyWhether you should offer a tip can also depend on whether the landscaper is: An independent contractor: More likely to accept and appreciate a tip directly. These professionals set their own rates and keep the full payment, so a tip is a personal gesture of gratitude. An employee of a landscaping company: Might be under a company policy that discourages or prohibits accepting tips. In these cases, tipping might need to go through the company or be offered in a different form (like a thank-you note or refreshments). Always ask or check company guidelines if you’re unsure.Factors That Influence Whether a Landscaper Accepts a TipWhether a landscaping tip is accepted depends on a number of factors: Company policy: Some companies train employees not to accept tips to maintain professionalism. Geographic location: Tipping norms vary. In urban or higher-cost-of-living areas, tipping might be more common than in rural regions. Type and scale of service: For one-time large-scale projects (e.g., tree removal, hardscaping), tipping is more typical than for standard weekly lawn mowing. Customer relationship: If you have a recurring service with the same crew, a tip for lawn service at the end of the season or year is a kind gesture. You can read about landscape design services in Bay Area.Do You Tip Landscapers? Common Etiquette and Expectations for Tipping LandscapersWhile tipping is not always expected in the landscaping industry, offering a landscaping tip is a considerate way to show appreciation—especially when the job is well done. Like many service-based roles, tipping landscapers is more common in specific situations and may depend on the scope of work, relationship with the service provider, and regional norms.Situations Where Tipping Is More or Less Expected More Expected: After a one-time, large project such as tree removal, sod installation, or landscaping design. If the crew worked in extreme weather conditions (heat, rain, etc.). When the job required extra effort or specialized skills. During holidays (some clients give holiday bonuses for ongoing services). Less Expected: If you’re already paying premium rates for the service. When company policy prohibits tipping. For brief or basic services like quick lawn mowing, unless done exceptionally well. In either case, a landscaping tip is never inappropriate if offered respectfully and in good spirit.One-Time Services vs. Ongoing ContractsWith one-time landscaping services, tipping is more straightforward. Depending on the complexity of the task and the number of the crew, a cash gratuity for landscaping work usually varies between $20 and $100.For ongoing lawn care or landscaping contracts, tipping is less frequent after each visit. Instead, a seasonal tip or year-end bonus is common. Clients might also occasionally offer refreshments or a small mid-season tip to show appreciation.When Service Goes Above and BeyondIf your landscaper: Fixes an unexpected problem without charging extra Spends extra time on detail work Provides free guidance or additional services. …then a landscaping tip is definitely appropriate. Exceptional service is a top reason clients consider tipping landscapers, even when it’s not standard practice.Comparison to Other Service ProfessionalsWhen deciding whether to tip, it helps to compare landscapers to similar service providers: Movers and cleaning crews are commonly tipped 10–20% of the service fee. Lawn care providers and landscapers fall into a similar category, especially for physically demanding or detailed work. Unlike restaurant staff (who rely heavily on tips), tipping landscapers is more about showing gratitude than meeting a wage gap. You can also read about Landscape construction in Bay Area.How Much Do You Tip Landscapers? Suggested Tipping Ranges and Practical GuidanceTipping is a thoughtful way to show appreciation for great landscaping work, but many people wonder: how much is appropriate? Whether you’re paying for a simple lawn mowing or a full backyard transformation, here’s a guide to help you navigate tipping landscapers with confidence.1. Basic Lawn Mowing or MaintenanceFor routine services like mowing, edging, or leaf blowing, tips are less expected but still appreciated—especially if the job is done particularly well or under tough conditions (e.g., extreme heat). Suggested Tip: $5–$20 per visit, or a $25–$50 tip for lawn service at the end of the season. Alternative: Offering cold drinks, snacks, or a holiday gift for recurring service providers. 2. Garden Design or Planting ServicesThese jobs require more time, skill, and artistic effort. If the landscaper spends time on custom design, choosing plants, or reworking your layout, tipping is more common. Suggested Tip: $20–$50 per worker, or 5–10% of the total job cost, depending on complexity. This level of service often builds a relationship, so repeat business may include seasonal or project-based tips. 3. Large-Scale Landscaping ProjectsFor major renovations—like installing irrigation systems, hardscaping, or full yard overhauls—tipping is more customary, especially if multiple crew members are involved or the project takes several

How To Install Concrete Landscape Edging Stones Curved
Uncategorized

How To Install Concrete Landscape Edging Stones Curved

How to install concrete landscape edging stones curved is a practical project that adds both beauty and functionality to any outdoor space. Curved concrete edging defines borders between lawn, garden beds, and walkways, offering a polished and professional appearance. It helps maintain clean lines while preventing grass or weeds from invading planted areas, making yard maintenance easier and more effective.Installing concrete curved edging is more than just a decorative upgrade—it provides long-term structural benefits. These curved concrete edging stones are especially ideal for gardens with flowing, organic layouts. Their smooth, rounded shapes follow natural lines, adding visual harmony while also resisting shifting or weather damage over time. In this step-by-step guide, we’ll show you how to plan your layout, prepare the site, and install curved concrete edging to ensure a strong, attractive border that lasts for years.What Are Curved Concrete Landscape Edging Stones? Curved concrete landscape edging stones are pre-formed, durable borders crafted from molded concrete with a gentle curve or serpentine shape. These curved edging stone elements are designed to create smooth, flowing lines that define the edges of lawns, garden beds, walkways, and other outdoor features. Unlike straight borders, curved designs follow the natural contours of a landscape, offering a more organic and visually appealing aesthetic.How They Differ from Straight Landscape Edge StonesThe key distinction between curved edging stones and straight ones lies in their form and flexibility. Straight landscape edge stones work best for formal garden layouts or structured geometric shapes. In contrast, curved edging is better suited for informal or natural-style landscapes, allowing for borders that flow gracefully around features like flower beds, trees, or winding paths. This adaptability makes curved concrete edging ideal for creative and custom outdoor designs.Popular Uses in Landscape DesignCurved concrete landscape edge stones serve a wide range of functions in both residential and commercial landscaping. Common applications include: Defining garden beds with smooth, natural curves Lining winding walkways or patio perimeters Framing circular features such as fountains or planters Softening sharp transitions in landscape layouts Their ability to blend seamlessly with softscape and hardscape elements makes them an excellent choice for enhancing both form and function in outdoor spaces.Material Options and Finishes While concrete is the most popular material for curved edging stones due to its strength and weather resistance, it’s available in a variety of finishes and textures to suit different design styles. These include: Smooth or textured surfaces Stamped designs mimicking brick, stone, or pavers Colored finishes to complement landscape themes Exposed aggregate for added decorative appeal These customizable options allow designers and homeowners to tailor their landscape edge stones to any setting—from classic to contemporary—while maintaining long-lasting durability and visual harmony.Benefits of Curved Concrete Edging Stones Aesthetic Appeal with Organic Flow Curved concrete edging adds a graceful, flowing design element to any landscape. The smooth lines of a curved edging stone complement natural garden layouts, creating a more organic and visually pleasing appearance compared to straight edges. Superior Durability and Weather ResistanceCurved concrete edging is extremely resilient and resistant to erosion, chipping, and cracking because it is made to survive the weather. Unlike plastic or wood alternatives, it maintains its form and function year-round, even in harsh climates. Clear Lawn and Garden Separation Curved edging stones help define borders clearly between lawns, flower beds, and pathways. This creates a tidy, organized landscape while guiding foot traffic and preventing grass or roots from creeping into garden spaces. Reduced MaintenanceBy keeping mulch in place and acting as a barrier to weeds, curved concrete edging helps reduce time spent on upkeep. The snug fit of each curved edging stone ensures long-term performance without shifting or sinking. Enhanced Property Value Professional-looking edging adds to curb appeal and can subtly boost property value. A well-installed curved edging stone border reflects attention to detail and a thoughtfully designed outdoor space. Tools and Materials Needed Tools Required Shovel – For digging the trench along the curved layout Rubber Mallet – To tap and secure each curved edging stone into place without damaging them Level – Ensures each landscape edge stone sits evenly for a clean, professional finish Tape Measure – To measure the length of your curve and calculate materials Garden Hose or String Line – For marking out the desired curved shape Hand Tamper or Plate Compactor – To compact the base layer of gravel or sand Wheelbarrow – For transporting materials like sand, gravel, and stones Trowel – Helpful for leveling and adjusting the base or backfill Safety Gear Gloves – To shield your hands from rough materials and sharp edges Safety Glasses – When handling gravel, sand, or cutting materials Knee Pads – Optional but helpful for kneeling while placing stones Steel-Toe Boots – To prevent foot injuries from heavy landscape edge stones Materials Needed Curved Concrete Edging Stones – Depending on your design, select the type and amount. Crushed Gravel – Utilized as a sturdy foundation under the edging Coarse Sand – Optional layer above gravel to help level stones Landscape Fabric (optional) – Helps prevent weed growth under the edging Mulch or Soil – For backfilling around the finished edge Concrete Sealant (optional) – To enhance appearance and protect the curved edging stone from weathering You should read about Landscape construction services in Bay Area.How to Install Concrete Landscape Edging Stones Installing curved concrete edging is a great way to add definition and structure to your landscape while enhancing its visual appeal. Follow these step-by-step instructions to install curved edging stone efficiently and professionally.Step 1: Plan and Design Your Edging LayoutStart by mapping out where you want your landscape edge stones to go. Sketch the desired curved shape of your border on paper or using landscape design software. Use a garden hose or string to lay out the curve physically in your yard. Measure the length of your layout to estimate how many curved edging stones you’ll need. Step 2: Dig the TrenchNext, dig a trench along the marked line. Make sure the trench is wide and deep enough

Uncategorized

How Much Does A Turf Football Field Cost

How much does a turf football field cost? This is a common question as synthetic turf fields gain popularity across schools, sports complexes, and professional stadiums. The shift from natural grass to artificial turf is driven by benefits such as lower maintenance, all-weather usability, and long-term durability. However, the turf field cost can vary widely depending on multiple factors. These include the size of the field, type and quality of turf, base preparation, drainage systems, and additional features like lighting or fencing. A typical turf field cost estimate ranges from $700,000 to over $1.5 million. When Turf is more expensive to install initially than natural grass, but because it requires less upkeep and water, it frequently ends up being more economical in the long run.How Much Does a Turf Football Field Cost? Average Cost Range: $700,000 – $1.5 millionThe cost of an artificial grass football field varies significantly depending on several key factors, including field size, materials, site conditions, and the level of play it’s intended for (youth, high school, college, or professional use). The cost components of an artificial grass football field are broken down as follows:1. Materials – $250,000 to $400,000This includes: Synthetic turf: The most significant material cost. Infill: Crumb rubber, sand, or organic materials that add cushion and durability. Shock pads (optional): For added safety and better impact absorption. 2. Site Preparation – $50,000 to $100,000Costs here depend on: Demolition of any existing surface. Excavation and grading. Soil stabilization (if needed). 3. Base Construction – $100,000 to $200,000Includes: Building a stable sub-base of crushed stone or other material. Compacting and leveling the foundation to support turf and prevent sinking or warping. 4. Drainage Systems – $50,000 to $100,000Proper drainage is critical to prevent water pooling and prolong the field’s life. Costs can vary based on the location’s climate and soil permeability.5. Installation Labor – $100,000 to $300,000Professional installation teams ensure the synthetic turf is properly laid, seams are bonded, and the infill is evenly distributed.6. Cost Differences Based on Field Usage Usage Level Estimated Cost Youth Leagues $700,000 – $900,000 High School $900,000 – $1.2 million College $1.1 million – $1.4 million Professional $1.2 million – $1.5+ million Higher-level play requires premium materials, stricter specifications, and possibly amenities like shock pads or advanced drainage systems, increasing the total artificial grass football field cost.Additional Costs to Consider Lighting systems: $150,000 – $300,000 Scoreboards: $25,000 – $100,000 Bleachers and fencing: $50,000 – $250,000 Ongoing maintenance: $5,000 – $15,000 annually You can also read about Turf Installation in the Bay area.What Influences Turf Football Field Cost? The total turf field cost depends on more than just the synthetic grass itself. Multiple variables can raise or lower the price, depending on site conditions, design choices, and intended use. Your turf field cost estimate is influenced by the following important factors:1. Field Size and Design A standard football field (360 ft x 160 ft) is the baseline for most pricing. Custom dimensions, end zones, or multi-sport markings increase layout complexity and material needs, raising the turf field cost. 2. Type and Quality of Synthetic Turf Turf systems vary in pile height, fiber type (monofilament vs. slit-film), infill material, and shock absorption. Higher-performance turf for college or pro use typically costs more but offers better durability and safety. Infill options like organic cork or thermoplastics are more expensive than standard crumb rubber. 3. Geographic Location Material availability, labor rates, and delivery logistics vary widely by region. Harsh climates may also require more robust turf systems and drainage solutions, increasing the turf field cost estimate. 4. Sub-Base and Drainage A strong, stable base is critical to field longevity. Sites with poor soil or grading may need extra excavation, soil stabilization, and advanced drainage, which can significantly increase project cost. 5. Additional Features Popular add-ons include: LED field lighting Scoreboards and sound systems Fencing and bleachers These upgrades can add $100,000–$500,000+ depending on scale and quality. 6. Permits and Environmental Considerations Local codes may require zoning permits, environmental assessments, or stormwater management plans. These specifications may cause your project to take longer and spend more money. By understanding these factors, schools, municipalities, and organizations can make informed decisions and build a realistic turf field cost estimate tailored to their needs and location.You can also read about Can You Lay Turf Over Existing Grass.How Much Does Football Turf Maintenance Cost? Annual Maintenance Cost Estimate: $5,000 – $15,000While the upfront turf field cost can be significant, maintenance expenses are generally much lower than those of natural grass fields. The cost of artificial grass football field upkeep is predictable, efficient, and less labor-intensive.Typical Turf Maintenance Tasks Include: Brushing and Grooming: Frequent brushing uniformly distributes infill and maintains the fibers erect. Infill Top-Ups: Over time, infill can become compacted or displaced and may need replenishing. Surface Sanitization: Periodic cleaning helps control bacteria, odors, and allergens. Repairs and Inspections: Minor seam repairs and routine inspections ensure safety and extend turf lifespan. Turf vs. Natural Grass Maintenance Costs Maintenance Type Artificial Turf Natural Grass Annual Cost $5,000 – $15,000 $20,000 – $50,000+ Water Usage None High Fertilizers/Pesticides Not needed Required Mowing & Labor Minimal Frequent Over time, the lower maintenance requirements of turf can offset a portion of the initial turf field cost. This makes the cost of artificial grass football field ownership more predictable and budget-friendly long-term.Is a Natural Grass Pitch Cheaper Than a Turf Field? When evaluating a turf field cost estimate versus the cost of a natural grass pitch, it’s essential to look at both the upfront investment and the long-term financial impact. While turf has a higher initial price tag, it often proves more cost-effective over time.Upfront Cost Comparison Artificial Turf Field: Initial Cost: $700,000 – $1.5 million Higher due to materials, base construction, and installation. Average artificial grass football field cost includes infill, drainage systems, and professional labor. Natural Grass Field: Initial Cost: $300,000 – $500,000 Less expensive to install but often requires irrigation systems, sod or seed, and more frequent labor. Long-Term Value

Can You Lay Turf Over Existing Grass? Find Out Why Not
Uncategorized

Can You Lay Turf Over Existing Grass

Can you lay turf over existing grass and still achieve a healthy, long-lasting lawn? It’s a question many homeowners ask when considering quicker alternatives for lawn improvement. While laying turf over old lawn or installing turf on grass may seem like a convenient shortcut, it often leads to issues like poor root growth, uneven surfaces, and water drainage problems. This method is tempting because it avoids the labor of removing the old grass but the results are rarely as lush or durable as expected. In this guide, we’ll walk you through the key pros, cons, and expert tips to help you make the right choice for your landscape.Can You Lay Turf Over Existing Grass? Technically, yes but turfing over existing lawn is generally not recommended if you’re aiming for a healthy, long-lasting result.What Happens When You Turf Over an Existing Lawn? At first glance, laying turf over existing grass might seem like an easy time-saver, but it often leads to disappointing outcomes. Here’s why: Uneven Decomposition: The old grass underneath breaks down at varying rates, causing bumps and an uneven lawn surface.   Poor Root Establishment: The new turf has difficulty penetrating the underlying layer, making it harder to access essential nutrients and moisture.   Increased Risk of Rot and Disease: The trapped grass layer can create a damp, low-oxygen environment ideal for fungal growth and root rot. What’s Ahead To help you make an informed choice, we’ll explore: Why some homeowners choose turfing over existing lawn   How to properly prepare the area before laying new turf   Proven methods to ensure your lawn thrives for years to come What to Consider When Laying New Turf Over Old Grass Before turfing over existing lawn, it’s important to assess the condition of the area you’re covering. While it might seem like an easy fix, there are several crucial factors to consider. Ignoring these can lead to turf failure and wasted effort.1. Soil QualityThe success of your new turf on grass depends heavily on what’s underneath. If the existing lawn has poor soil  lacking nutrients, structure, or organic matter – the new turf will struggle to establish healthy roots. Ideally, you should remove the old lawn and prepare the soil properly to give the turf the best possible start.2. DrainagePoor drainage is one of the biggest killers of new turf. When you lay turf on grass, water can get trapped between the two layers, especially if the underlying soil is compacted or clay-heavy. This stagnant moisture can cause root rot, mold, and other fungal diseases. Always assess how well water moves through the area before turfing.3. Surface LevelnessAn uneven lawn will only become more uneven if you lay turf over existing lawn. The old grass may decompose unevenly, creating lumps, dips, and soft spots in your new lawn. These imperfections are not only unsightly but can also make mowing difficult and promote water pooling in low areas.4. Weed and Pest ControlIf your old lawn had issues with weeds, grubs, or other pests, those problems won’t magically disappear. In fact, laying turf on grass without treating these issues can trap pests below the surface, where they can continue to damage your new turf from underneath.5. Soil CompactionCompacted soil is one of the main reasons why turfing over existing lawn fails. New turf roots need to penetrate into the ground to anchor themselves and access water and nutrients. If the old lawn is hard and compacted, roots will struggle to grow, leading to poor establishment and eventual turf dieback.You can read about Turf installation in Bay area.6 Reasons Not to Lay New Turf on Top of an Old Lawn While laying turf over existing lawn might seem like a quick and easy solution, it often leads to disappointing results. Below are six important reasons why this approach is not recommended:1. Poor Root EstablishmentNew turf needs direct contact with well-prepared soil to root deeply and securely. When turfing over existing lawn, the old grass layer acts as a barrier, preventing proper root penetration. As a result, the new turf can remain shallow-rooted and unstable.2. Risk of Turf Disease and FungusOld, decaying grass beneath fresh turf creates a damp, oxygen-poor layer that encourages fungal growth and turf diseases. This trapped moisture environment is one of the biggest risks of laying turf over existing lawn.3. Unwanted Weed Growth from Old LawnAny weeds or weed seeds present in the original lawn can easily push through the new turf. Since turfing over existing lawn doesn’t eliminate the problem at the root, you’ll likely see unwanted plants reappear quickly.4. Uneven Settling and Surface LumpsAs the old lawn breaks down, it decomposes at inconsistent rates, leading to sinking, soft patches, and lumps. This results in a bumpy surface that not only looks unattractive but can also make mowing and walking difficult.5. Ineffective Nutrient AbsorptionFresh turf requires nutrients from the soil below. If you place turf over existing lawn, the layer of old grass can block nutrient exchange, starving the new turf of essential elements needed for healthy growth.6. Increased Waterlogging RiskThe leftover grass layer can retain excess water, leading to soggy soil conditions. This significantly raises the chance of waterlogging, especially in areas with poor drainage – a major threat to new turf health.Why Won’t New Turf Survive Over Old Grass? Laying new turf over old grass may seem convenient, but it often leads to failure. Here’s why your fresh lawn won’t thrive if it’s simply rolled out over the old one:A Barrier Between Turf and SoilWhen new turf is placed on top of an existing lawn, the layer of dead or dying grass beneath acts as a barrier. Instead of rooting directly into nutrient-rich soil, the fresh turf sits on top of organic matter that is already decomposing. This prevents strong root establishment and makes the turf more vulnerable to environmental stress.No Direct Contact with SoilSuccessful turf installation depends on immediate and firm contact with the soil below. Without that contact, the roots of the new turf can’t

Our Client's Reviews

Copyright © 2025 | Localpro1 | All Rights Reserved.

English