How to install paver walkway is a common question for homeowners looking to enhance their outdoor space. A paver walkway is a path made from interlocking stones such as brick, concrete, or natural stone, offering both function and aesthetic appeal. Installing paver walkway improves curb appeal, adds property value, and creates a clean, durable surface for walking. It’s a low-maintenance solution that works well in gardens, yards, and driveways. Everything from preparation and supplies to the detailed installation of a paver walkway will be covered in this guide. Whether you’re going DIY or hiring help, you’ll learn what’s involved in the process.
Why Paver Walkways are Perfect for Your Home
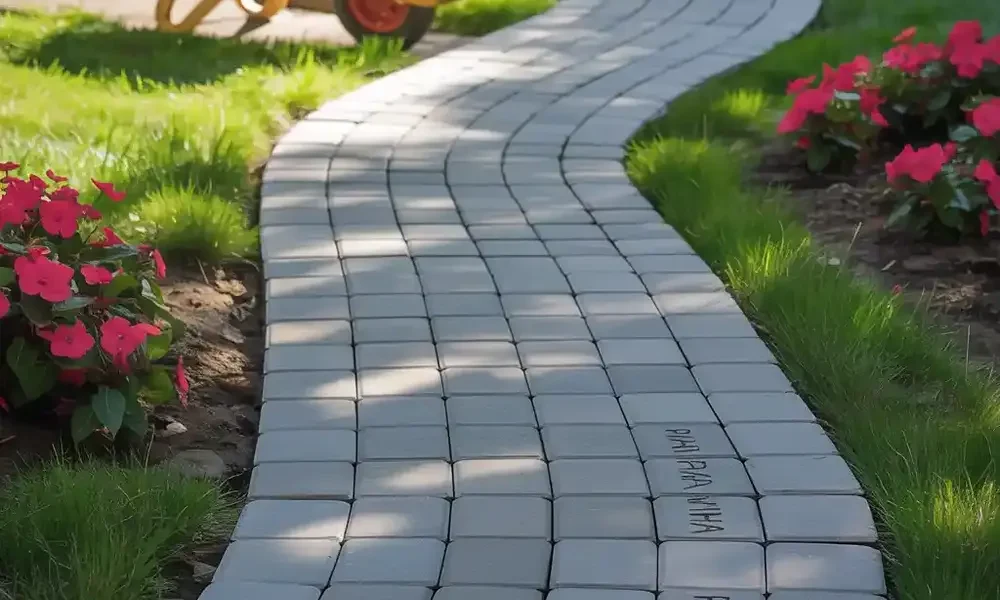
When it comes to enhancing your home’s exterior, few upgrades are as visually appealing and functional as a stone paver walkway. Whether leading guests to your front door or guiding you through a lush garden, paver walkways offer a timeless charm that blends beauty with practicality. They’re a great option for homeowners for the following reasons:
1. Aesthetic Value and Curb Appeal
A well-designed stone paver walkway immediately improves the curb appeal of your house.. Available in a wide variety of colors, shapes, and textures, pavers can be arranged in patterns that complement your home’s style, whether modern, rustic, or traditional. This added visual appeal not only makes your property more inviting but also leaves a lasting impression on visitors and potential buyers.
2. Durability and Low Maintenance
Unlike poured concrete or asphalt, paver walkways are known for their resilience. They can withstand heavy foot traffic, fluctuating weather, and ground movement without cracking. It is simple to replace individual pavers without affecting the remainder of the route if a piece is damaged. Routine maintenance involves basic cleaning and occasional re-sanding of joints—making paver sidewalk installation a smart, long-term investment.
3. Eco-Friendliness and Drainage Benefits
Water can percolate through the joints in paver systems, which encourages natural drainage and lowers runoff. This feature helps prevent erosion and flooding, especially in areas prone to heavy rain. Choosing permeable pavers can also support sustainable landscaping goals and reduce your home’s environmental footprint.
4. Customization Options and Increased Property Value
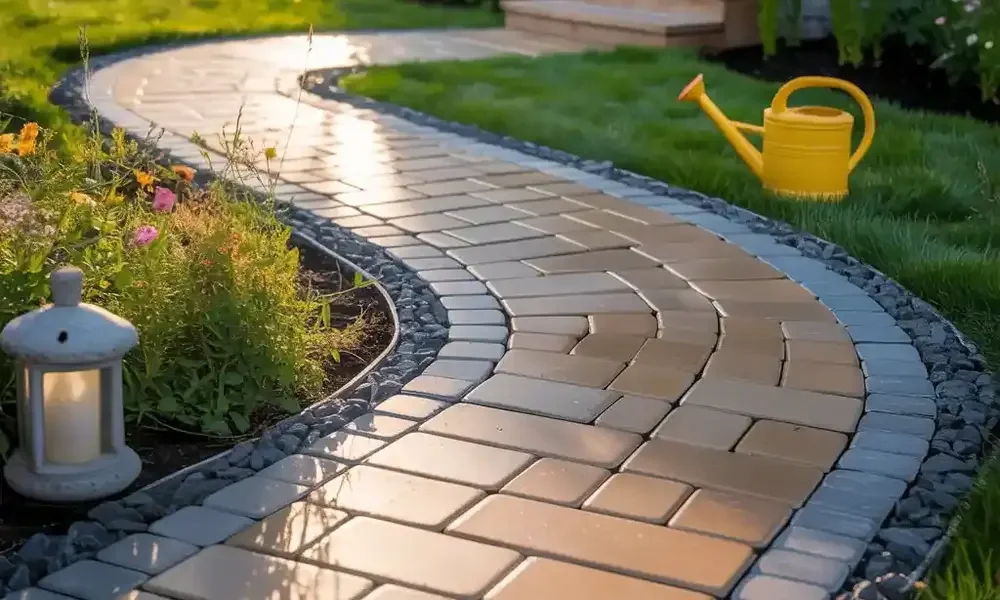
With nearly limitless design possibilities, paver sidewalk installation gives you the freedom to create a walkway that reflects your personal style. You can mix and match colors, integrate borders, or include decorative inlays for a unique touch. In addition to enhancing aesthetics, a well-crafted stone paver walkway can significantly increase your home’s resale value by boosting both functionality and appearance.
Ready to Upgrade Your Outdoor Space?
If you’re considering a home improvement project that combines elegance, durability, and eco-conscious design, a paver sidewalk installation may be the perfect solution. Invest in a stone paver walkway today to enjoy long-lasting beauty and value.
You can read about paver installation service in Bay area.
How to Install Paver Walkway | Step-by-Step Guide
A well-designed walkway not only adds beauty to your home but also improves accessibility and functionality. Whether you’re upgrading your front yard or adding charm to your garden path, installing a paver walkway is a rewarding DIY project. Follow this step-by-step guide to ensure a durable, professional-looking result.
1. Planning and Design
Before laying a paver walkway, careful planning is crucial.
- Measuring and marking the walkway: Outline your desired path using marking paint or a garden hose. Measure the length and width to calculate how many pavers you’ll need.
- Choosing paver style and pattern: Pick pavers that complement your home’s exterior. Running bond, basket weave, and herringbone are popular designs.
2. Excavation
Proper excavation sets the foundation for a long-lasting paver sidewalk installation.
- How deep to dig: Typically, you’ll need to dig 6–8 inches deep—more if you live in a cold climate or plan to support heavy traffic.
- Tips for removing grass and soil: Use a sod cutter or flat shovel to remove grass. Make sure the trench’s bottom is level.
3. Laying the Base
The base supports the weight of the pavers and prevents shifting over time.
- Adding and compacting gravel: Fill the excavated area with 4–6 inches of crushed stone or gravel. Compact it thoroughly using a plate compactor.
- Importance of proper base depth: A solid, well-compacted base is critical for a stable, long-lasting walkway.
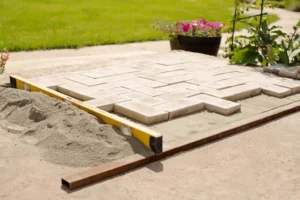
4. Screeding the Sand Layer
The sand layer creates a smooth, level bed for the pavers.
- Spreading and leveling sand: Add 1 inch of bedding sand over the gravel base. Use a screed board to level the surface.
- Ensuring a smooth surface: Avoid walking on the sand after screeding to maintain a flat, even layer.
5. Installing the Pavers
Now the fun part—laying a paver walkway.
- Placing pavers in your desired pattern: Start at one end and work your way across, placing pavers snugly against each other in your chosen layout.
- Using a mallet and level for proper fit: Use a rubber mallet to tap each paver into position, and use a level to verify it often.
6. Cutting Pavers (if needed)
Some pavers may need to be trimmed for a precise fit around curves or edges.
- Tools and techniques for shaping pavers: Use a masonry saw, chisel, or angle grinder. Always wear safety gear when cutting.
7. Securing the Edges
Edge restraints keep your walkway looking neat and prevent paver movement.
- Installing edge restraints to prevent shifting: Use plastic or metal edge restraints secured with spikes along the perimeter.
8. Compacting and Sealing
Final touches ensure your walkway stays in place and looks great for years.
- Using a plate compactor: To settle the pavers into the sand base, run the compactor over the whole surface.
- Spreading sand over joints: Sweep jointing sand into the gaps between pavers, then compact again. Repeat until joints are full.
- Optional: sealing your paver walkway: Applying a sealant enhances color and protects against stains and weather damage.
You can also read about How to Install a Paver Driveway.
How to Build a Paver Walkway on a Slope
Building a walkway on a slope may seem challenging, but with the right preparation and techniques, you can create a beautiful, stable path that resists erosion and drains properly. Whether your slope is gentle or steep, these tips will help you succeed when installing a paver walkway on uneven terrain.
1. Adjusting Your Base for Slope and Drainage
The foundation is especially important when laying a paver walkway on a slope. It ensures the walkway is stable, safe, and sheds water correctly.
- Determine the slope angle: Measure the grade of your slope. A mild slope (less than 15%) can usually be handled with standard installation techniques.
- Excavate and grade accordingly: Dig down following the natural slope of the land, maintaining a consistent depth for your gravel base. Always dig deeper at higher points to create a level base for the pavers.
- Incorporate proper drainage: Add a slight cross-slope (1-2%) to help water flow off the walkway. This reduces the risk of pooling and erosion.
2. Preventing Erosion
Without proper support, a sloped walkway can wash out or shift over time. Erosion control is key to a long-lasting path.
- Use compacted layers: When installing a paver walkway, add and compact gravel in layers (about 2 inches at a time). This helps lock the base into the slope.
- Install retaining edges: On steeper slopes, use timber, stone, or concrete edging to hold the walkway in place and direct water flow.
- Add landscape fabric: Place a layer of landscape fabric beneath the gravel base to prevent soil migration and help with water control.
3. Tips for Staggered Layering and Edge Support
A staggered pattern and reinforced edges help stabilize pavers on a slope.
- Stagger joints for added strength: When laying a paver walkway, use an offset or running bond pattern to prevent lines of weakness. This reduces the chance of pavers shifting downhill.
- Use edge restraints: Strong edge restraints, staked into the ground, are crucial for keeping pavers locked in place, especially on the downhill side.
- Backfill and compact around edges: Once the pavers are set, backfill around the walkway with soil or gravel and tamp it down to reinforce the sides.
How to Fix A Sinking Walkway
A sinking paver walkway not only looks uneven but can become a safety hazard. The good news? You can fix it without redoing the entire path. Here’s a quick guide to understanding the problem and getting your walkway level again.
Why Walkways Sink
- Poor base prep: Inadequate gravel depth or compaction during installing a paver walkway can lead to settling.
- Drainage issues: Water pooling under pavers erodes the base.
- Shifting soil: Freeze-thaw cycles and loose soil can cause movement.
How to Re-Level Pavers
- Remove the sunken pavers – Use a flat tool to lift them and set them aside in order.
- Dig out and check the base – Remove soft or washed-out material.
- Rebuild the base – Add and compact 4–6 inches of gravel, then 1 inch of sand.
- Reinstall pavers – Place them back in pattern, tap with a mallet, and level.
- Sand and compact – Sweep sand into joints and compact again.
Prevent Future Sinking
- Improve drainage so water runs away from the walkway.
- Use proper edge restraints to keep pavers in place.
- Inspect regularly and top up joint sand when needed.
With the right fix, your walkway will be safe and smooth again. And next time you’re laying a paver walkway, don’t skip on base prep—it makes all the difference.
Final Thoughts
Installing a paver walkway is a great way to enhance the beauty and functionality of your outdoor space. With careful planning, proper materials, and the right technique, you can achieve a durable and attractive path. If you’d prefer professional help or have any questions, Lakota Design Group is here for you. Contact us today for expert service and personalized guidance. Let’s bring your vision to life — Call now or request a quote! Your perfect walkway starts with Lakota Design Group.
FAQs
What Is The First Step In Installing A Paver Walkway?
The first step is to plan and measure the area where the walkway will be installed. It’s important to choose the right design and materials that match the landscape and overall look of your outdoor space.
How Do I Prepare The Ground For The Paver Walkway?
You will need to excavate the area to a depth of about 6-8 inches, depending on the thickness of the pavers and the base material. Afterward, you should compact the soil and add a layer of crushed stone or gravel to create a stable foundation.
Do I Need To Use A Base Material Under The Pavers?
Yes, a base material, typically crushed stone or gravel, is essential to provide stability and proper drainage. This will help prevent shifting or settling of the pavers over time.
Can I Install Pavers On My Own, Or Should I Hire A Professional?
While installing a paver walkway is a DIY project for many homeowners, it requires precision and attention to detail. If you’re not confident in your abilities, hiring a professional like Lakota Design Group ensures the job is done correctly and efficiently.
How Do I Make Sure My Paver Walkway Is Level?
Using a level and a long board, you can check the alignment of the pavers as you lay them. You should also ensure the walkway has a slight slope for proper drainage away from structures to avoid water accumulation.