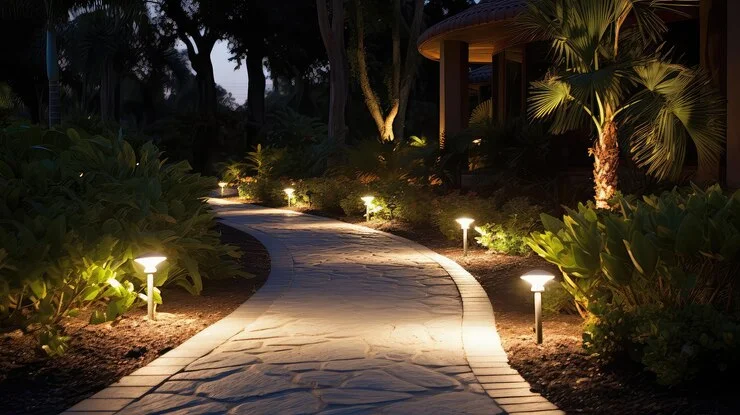
There’s something undeniably magical about a well-lit outdoor space. That soft glow lining a garden path, the way shadows play off tree trunks, and the warm light highlighting your home’s best angles—it all adds up to an atmosphere that’s not just beautiful, but deeply welcoming. Whether you’re enjoying a quiet evening outside or hosting friends after sundown, the right lighting turns your yard into an experience.
But landscape lighting isn’t only about aesthetics. It improves safety, guides guests, deters intruders, and extends the time you can enjoy your outdoor space. When done right, it blends form and function in the most stunning way possible.
So, how to install landscape lighting that not only looks great, but performs beautifully for years to come? It starts with a clear plan and the right strategy. From selecting the best fixtures to thoughtfully placing each light, every step contributes to the final glow that brings your landscape to life.In this guide, we’ll show you exactly how to install landscape lighting with purpose—from design inspiration to installation tips—so your outdoor space isn’t just lit, it’s transformed.

Why Landscape Lighting Matters
Before we get into the technical side of landscape lighting Bay area installation, it’s important to recognize the why behind it:
- Curb Appeal: Thoughtfully placed lights elevate the look of your home’s exterior.
- Safety: Path and step lighting prevent tripping hazards after dark.
- Security: A well-lit yard can deter intruders and make your property feel safer.
- Extended Use: Lighting allows you to enjoy your outdoor space well into the evening.
With these benefits in mind, let’s explore how to install landscape lighting step-by-step.
Step 1: Plan Your Landscape Lighting Layout
Before any wires are cut or lights are bought, start with a clear lighting plan.
Tips for Planning:
- Map Out the Area: Identify key areas like pathways, driveways, garden beds, trees, and architectural features.
- Determine Purpose: Is the goal ambiance, safety, or accent lighting? This will help you choose the right fixtures.
- Consider Light Placement: Avoid placing lights directly in people’s eyes. Use angles and indirect lighting to create softness.
This is the brainstorming phase of your landscape lighting install. Take your time to sketch the area and mark where you want each light fixture to go.
Step 2: Choose the Right Fixtures and Bulbs
Not all outdoor lighting is created equal. Choosing the proper fixtures will impact the quality, durability, and design of your project.
Common Fixture Types:
- Path Lights: Ideal for walkways and garden borders.
- Spotlights: Used for uplighting trees or architectural features.
- Well Lights: Recessed into the ground for a sleek, modern look.
- Deck and Step Lights: Enhance safety and style on stairs and platforms.
When selecting fixtures, make sure they’re rated for outdoor use. For bulbs, opt for LEDs as they’re energy-efficient, long-lasting, and come in various color temperatures to suit your desired look.
This stage is critical to a successful landscape lighting install, so don’t rush it.
Step 3: Gather Tools and Materials
Once you’ve selected your fixtures, it’s time to gather all the necessary materials for installing landscape lighting. Here’s what you’ll typically need:
Tools:
- Shovel or trenching tool
- Wire stripper
- Drill (if mounting lights on walls or decks)
- Multimeter (for voltage testing)
Materials:
- Low-voltage transformer
- Outdoor-rated cable
- Light fixtures and bulbs
- Waterproof wire connectors
- Mounting stakes or hardware
This step ensures you’re fully prepared before starting your landscape lighting installation project.
Step 4: Install the Transformer
Most residential outdoor lighting systems use low-voltage electricity for safety and energy efficiency.
Installation Steps:
- Mount the Transformer: Place it near an outdoor GFCI outlet.
- Connect to Power: Plug the transformer into the outlet.
- Run Main Line Cable: This will carry power from the transformer to your fixtures.
When learning how to install landscape lighting, understanding how the transformer works is vital. It reduces your household voltage (typically 120V) down to a safer 12V for outdoor use.
Step 5: Lay Out and Connect the Lights
Now the fun part begins—setting out the fixtures and making connections.
Here’s How:
- Place the Fixtures: Set them on the ground in your planned spots.
- Lay the Cable: Run the wire alongside the fixtures.
- Make the Connections: Use waterproof connectors to attach the fixtures to the cable.
- Test the System: Turn on the power and ensure each light is working properly.
This part of the landscape lighting installation requires attention to detail. Always test connections before burying any wires.
Step 6: Bury the Cable and Secure Fixtures
Once you’re confident the system is working, it’s time to secure everything in place.
- Bury the Wire: Dig a shallow trench (about 6 inches deep) and lay the cable inside.
- Mount Fixtures: Secure path lights with stakes and mount deck or wall lights using screws.
- Adjust Angles: Tilt spotlights to highlight plants or structures precisely.
Proper cable management ensures safety and keeps your landscape lighting install looking neat and professional.
Step 7: Fine-Tune the Lighting Effects
After dark, go outside and assess the lighting. This is where the magic happens!
- Adjust Angles: Modify the direction of spotlights or path lights.
- Control Brightness: Some transformers have dimmers or timers you can tweak.
- Check for Shadows or Glare: Move or re-aim lights to fix unwanted effects.
A well-executed install landscape lighting job should create soft, ambient glows—not harsh, blinding beams.
Step 8: Maintain Your Landscape Lighting
Installing landscape lighting is only part of the journey. Maintenance is key to keeping it looking and functioning like new.
Maintenance Tips:
- Clean Fixtures: Dirt or leaves can block light output.
- Check for Damage: Replace bulbs or connectors as needed.
- Inspect Cables: Look for signs of wear, chewing (by critters), or disconnection.
By doing periodic checks, your landscape lighting install will remain in top condition year-round.
you can read about Are String Lights Best for Patio Lights?
Value of Professional Landscape Lighting Installation
When it comes to installing landscape lighting, experience, precision, and design expertise matter. A well-lit outdoor space isn’t just about placing a few lights in the ground—it’s about creating balance, enhancing safety, and highlighting the best features of your landscape with intention.
Working with a professional lighting specialist ensures:
- Safe Electrical Work: Proper installation minimizes risks and follows all safety standards.
- Clean, Professional Results: Fixtures are installed seamlessly, with wiring neatly concealed and secured.
- Strategic Light Placement: Lighting is thoughtfully positioned to highlight focal points, avoid glare, and enhance curb appeal.
- Long-Term Reliability: With quality components and expert installation, your system is built to last and perform consistently.
If you’re in the Bay Area and planning to install landscape lighting, partnering with a trusted local expert can make all the difference. From concept to completion, professionals bring a level of craftsmanship and care that ensures your lighting not only looks beautiful—but functions flawlessly for years to come.
you can also read about Which Outdoor Lighting Does Not Attract Bugs?
Why Choose Lakota Design Group?
If you’re ready to elevate your outdoor space but don’t want to tackle landscape lighting installation yourself, let the professionals at Lakota Design Group help.
With over 49 years of combined experience, Lakota Design Group specializes in:
- Custom landscape lighting installs tailored to your property
- Low-voltage systems that enhance beauty and safety
- Integration with landscape design, artificial turf, and outdoor project management
- Residential and commercial solutions across the Bay Area
Don’t leave your yard in the dark. Lakota Design Group combines creativity, quality materials, and expert installation to ensure your outdoor space shines—literally.
Final Thoughts
Understanding how to install landscape lighting is the first step toward creating an outdoor space that feels warm, inviting, and visually stunning. Every detail—from the initial planning and design to fixture placement and lighting angles—plays a critical role in the final look and performance of your system.
The key to a truly impactful landscape lighting installation lies in expertise, precision, and a deep understanding of both aesthetics and functionality. When it’s done right, lighting doesn’t just illuminate—it elevates.If you’re ready to bring your landscape to life after dark, trust the professionals at Lakota Design Group. With decades of experience and a passion for beautifully lit environments, we approach every project with creativity, attention to detail, and a commitment to excellence. Let Lakota Design Group turn your vision into a radiant reality—where every evening feels like a work of art.
FAQs
1. What is the purpose of landscape lighting installation?
It enhances safety, adds beauty, highlights features, and allows you to enjoy your yard at night.
2. How do I start planning a landscape lighting install?
Begin by mapping out key areas, identifying focal points, and choosing lighting types for each space.
3. What kind of lights are best for pathways and gardens?
Path lights are ideal for walkways, garden borders, and low-level lighting needs.
4. Why is low-voltage lighting recommended?
It’s energy-efficient, safer for outdoor use, and ideal for residential landscape lighting installs.