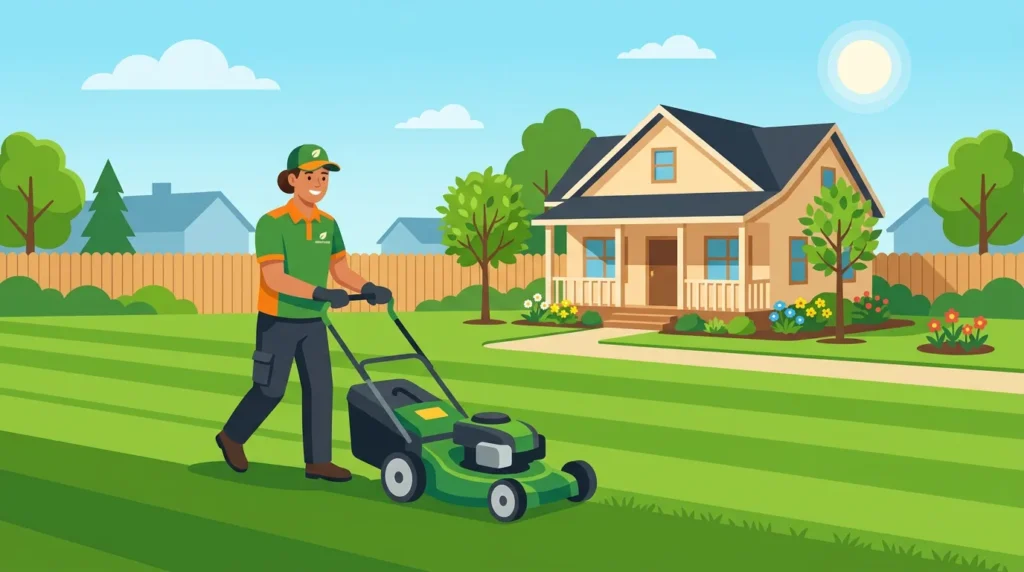
Your driveway takes more abuse than any other part of your yard. Heavy vehicles, rain, heat, and freeze-thaw cycles hit it constantly. If it’s cracked, sunken, or just plain ugly, you already know it needs to go.
Here’s the good news: knowing how to install a paver driveway correctly means you end up with a surface that lasts 25–30 years, handles heavy loads without cracking, and looks great from day one. This guide walks you through every step, from planning and excavation to laying the final paver and filling the joints. Whether you’re doing it yourself or hiring a contractor, you’ll know exactly what a quality installation looks like and what to watch out for.
Table of Contents
ToggleKey Takeaways
- A proper base (6–12 inches of compacted gravel) is the most critical part of any paver driveway
- Budget between $10–$70 per square foot depending on paver type and site conditions
- Polymeric sand outperforms regular sand for joint stability and weed prevention
- Most Bay Area homeowners need a permit before breaking ground
- DIY is possible for small areas, but driveways almost always need a pro crew
Planning Your Paver Driveway
Good planning prevents expensive mistakes later.
Measure the area first
A standard two-car driveway runs about 20 feet wide and 20 feet long (400 sq. ft.). Measure yours carefully. You’ll need this number for material estimates.
Check local permits
In San Jose and most Bay Area cities, you need a permit for driveway construction. Call your local building department before digging anything. Skipping this step can result in fines or forced removal.
Assess your soil
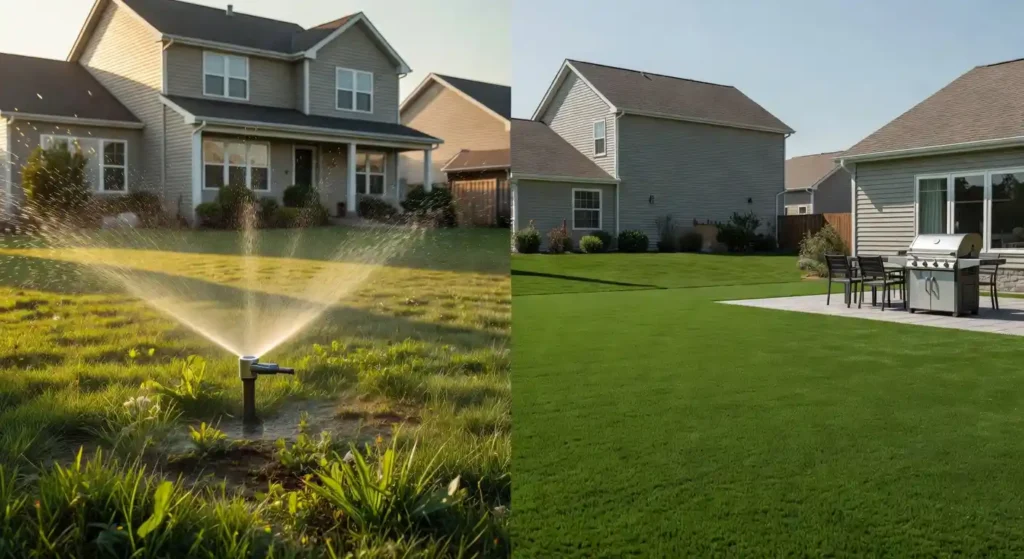
Soil with a lot of clay doesn’t drain well. Soil with sand in it drains quickly. Your soil type directly affects how deep you need to excavate and whether you need extra drainage. A simple percolation test will tell you how quickly your soil absorbs water. Make a hole that is 12 inches wide and 18 inches deep, fill it with water, and see how quickly the water level drops. You may need more drainage if it doesn’t descend at least 1 inch every hour.
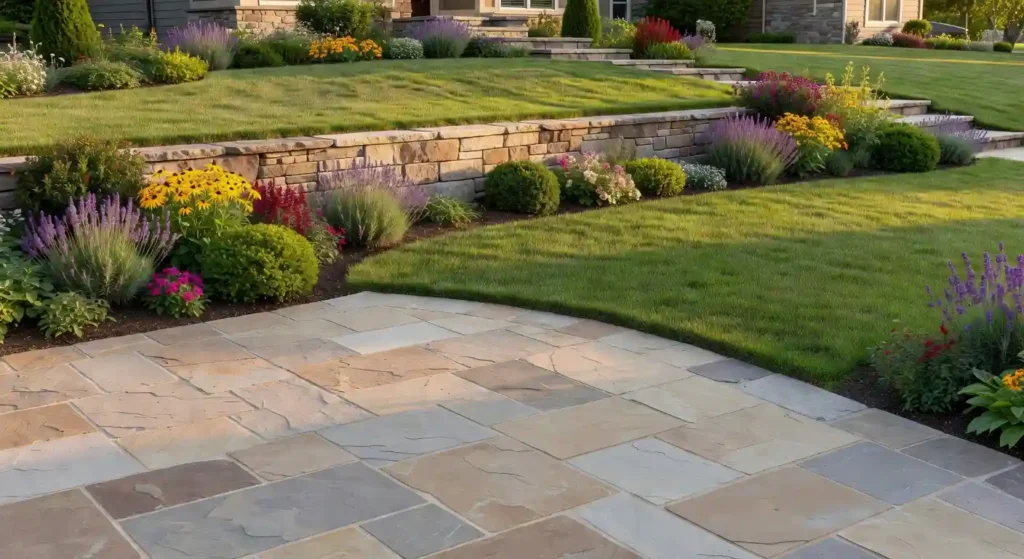
Pick your paver style
Concrete pavers are the most popular. They’re strong, affordable, and come in dozens of colors and patterns. Brick pavers offer a classic look. Natural stone costs more but adds serious curb appeal. Choose a paver rated for vehicular use. Not all pavers handle car traffic.
Design your pattern
Common patterns include running bond, herringbone, and basket weave. Herringbone is the strongest under vehicle load. If you want a border, choose a stone that matches your home’s trim or roof color rather than trying to match the main field paver exactly.
Essential Tools and Materials for a Paver Driveway
Before you start, gather everything on this list.
Tools you need:
- Plate compactor (reversible, minimum 10,000 lb driving force)
- Excavator or skid steer for large areas
- Shovels and rakes
- Wheelbarrow
- Level and string line
- Rubber mallet
- Concrete saw or paver splitter
- Screed pipes (1-inch OD steel pipes)
- Straight screed board or aluminum bar
- Push broom
Materials you need:
- Vehicular-rated concrete pavers
- Road base gravel (ASTM D 2940) — ⅝” minus crushed stone
- Coarse bedding sand (concrete sand) or ¼” chip (HPB or ASTM No. 9)
- Polymeric sand for joints
- Geogrid or DriveGrid for base reinforcement
- Plastic or metal edge restraint
- 12-inch landscape spikes for edging
- Filter fabric for edges abutting soil
How to Install a Paver Driveway: Step-by-Step Instructions
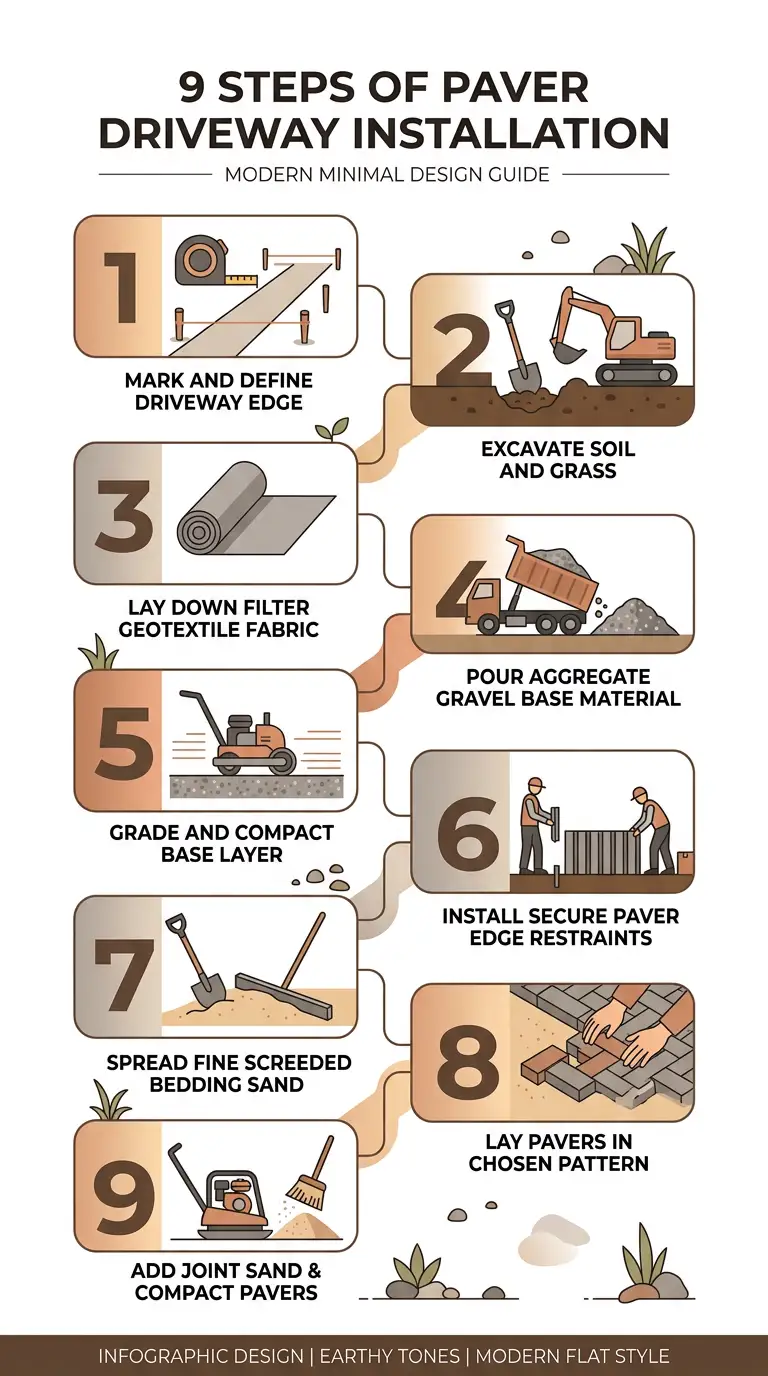
This is the core of the process. Follow each step carefully. Rushing any phase leads to shifting, sinking, and expensive repairs later.
Step 1: Call 811 and Mark Utilities
Before any digging, call 811. This is free and required by law. Underground utility lines get marked within a few days. This protects you and your crew.
Step 2: Excavate the Area
Dig down 12–15 inches below your finished surface level. This depth covers your base, bedding layer, and pavers. Use string and stakes to mark the boundary. Extend the excavated area 6–8 inches beyond the driveway edge. This gives you room for edge restraint and keeps the finished border stable.
Remove all grass, roots, and loose soil. You want a firm, undisturbed subsoil at the bottom.
Step 3: Install the Base
This is the most important step. A weak base causes everything above it to fail.
- Place geogrid directly over the compacted subsoil. Each section should overlap the next by 12 inches. This stiffens the gravel layer and prevents rutting under vehicle load.
- Spread 3–4 inches of road base gravel (ASTM D 2940) over the geogrid.
- Compact with at least three passes using your plate compactor.
- Add a second layer of geogrid, then another 3–4 inches of gravel.
- Compact again with three passes minimum.
- Repeat until you reach your desired base depth (typically 6–8 inches total compacted gravel).
- Use string lines to maintain a consistent slope of about ⅛ inch per foot, directing water away from your home.
For permeable paver systems, use ¾-inch washed crushed stone (ASTM No. 57) instead of road base gravel. This allows water to drain down through the base and back into the soil.
Step 4: Screed the Bedding Layer
The bedding course sits between your compacted base and the pavers. It should be exactly 1 inch thick.
- Lay 1-inch OD steel pipes on top of the compacted base, spaced about 6 feet apart.
- Cover with coarse concrete sand or ¼-inch chip stone.
- Pull a straight screed board across the pipes to create a smooth, flat surface.
- Remove the pipes and fill the grooves carefully.
- Do not walk on the screeded surface before laying pavers.
One important note: do not use mason’s sand, limestone screenings, or beach sand. These hold moisture and cause rutting over time.
Step 5: Install Edge Restraints
Edge restraints keep pavers from spreading outward under load. Install them before laying any pavers along edges that don’t abut a concrete curb or garage floor.
- Plastic edging is the most common choice. Fast to install, clean look, practical for straight or curved runs.
- Spike it into the base course (not the bedding layer) using 12-inch spikes every 12 inches.
- Keep it tight against where the pavers will sit.
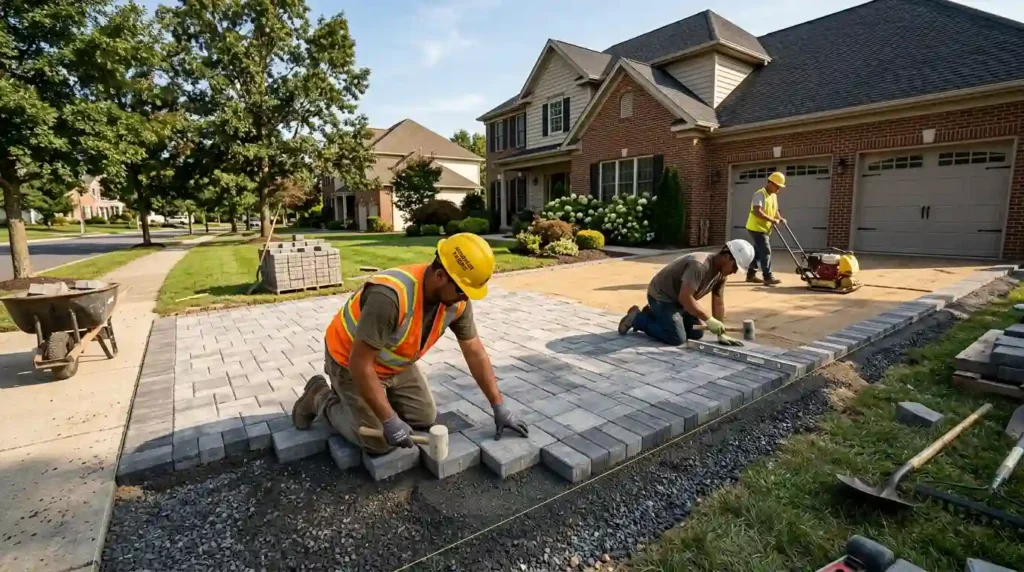
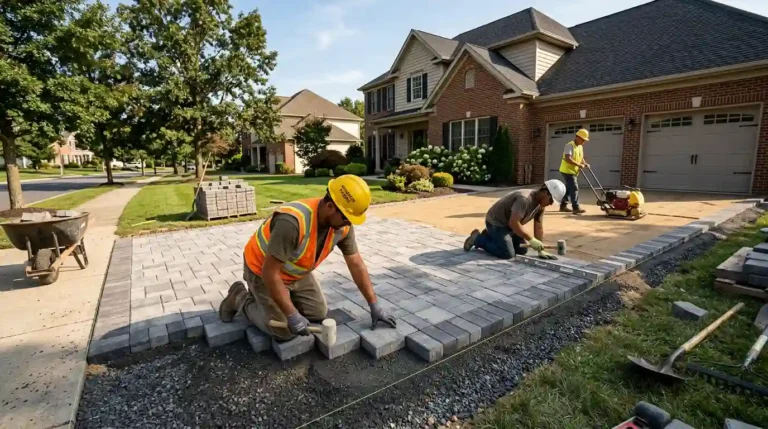
Step 6: Lay the Pavers
Start at the garage end or a fixed straight edge. Work outward.
- Place the first row perpendicular to your home. This prevents awkward cuts where pavers meet the garage floor.
- Lay pavers tight together following your chosen pattern.
- Tap each paver with a rubber mallet to set it firmly.
- Check alignment with a string line every 6–10 rows. Pavers drift if you don’t check often.
- Draw from multiple bundles as you go to blend colors naturally.
- Do not drive any equipment on the uncompacted surface.
Step 7: Cut Pavers to Fit
Along edges, curves, and obstacles, you’ll need cut pieces. Use a wet saw or a saw with a dust mitigation system. OSHA requires dust-free cutting for masonry products. Always wear eye protection, gloves, and a dust mask.
Save cut-off pieces. You can often use them to fill gaps elsewhere and reduce waste.
Step 8: Compact the Surface
After all pavers are laid and edge restraints are in place, compact the entire surface.
- Use a plate compactor with a polyurethane pad to avoid scratching the paver surface.
- Make at least three passes in three different directions.
- Do not put sand in the joints before this step. Compacting without sand first levels height variations between pavers.
Step 9: Fill the Joints with Polymeric Sand
Polymeric sand is the best choice for joint filling. It contains binding agents that harden when wet, locking pavers together and blocking weeds, ants, and erosion.
- Sweep polymeric sand across the entire surface using a push broom.
- Sweep diagonally to push sand deep into joints.
- Compact again to settle the sand.
- Repeat sweeping until joints are filled to ⅛ inch below the paver chamfer.
- Activate with water following the product label exactly.
- Choose a dry day. Rain before the sand sets will wash it out.
Paver Driveway Maintenance and Care
A well-installed paver driveway needs very little maintenance. Here’s what to do each year:
- Annual cleaning. Sweep or blow off debris. Use a pressure washer on low setting for deeper cleaning. Avoid harsh chemical cleaners that break down polymeric sand.
- Refill joints as needed. Over time, joint sand settles. Add polymeric sand to any low joints before weeds find their way in.
- Remove weeds promptly. Pull them by hand or use an eco-friendly herbicide. Refill that joint immediately after.
- Seal if desired. Sealing is not required but protects color and adds surface hardness. Use a sealer recommended for your specific paver product. Wet-look sealers enhance color. Matte sealers preserve a natural look. Re-seal every 3–5 years.
- Replace damaged pavers individually. This is one of the biggest advantages over concrete. Pull the damaged paver, adjust the bedding sand, drop in a new one, and refill the joint. No cutting out large sections.
Troubleshooting Common Paver Driveway Problems
Pavers that are sinking or moving. This nearly always means that the base has failed. The base may not have been deep enough or adequately compacted, or water may be washing away the bedding layer. Take out the damaged pavers, reconnect the base, re-screed the bedding, and put them back in place.
Standing water on the surface. Your slope is off. Water should run away from the house at ⅛ inch per foot. If it’s pooling, the grade needs correcting.
Weed growth in joints. Joint sand has eroded or was never polymeric. Clean the joints, remove weeds, and refill with polymeric sand.
Pavers rocking or clicking. The bedding layer is uneven or too thick. Remove the paver, adjust the sand, and reset.
Cracks in individual pavers. Replace only the cracked paver. This is easy and cheap compared to any concrete repair.
How Much Does It Cost to Install a Paver Driveway?
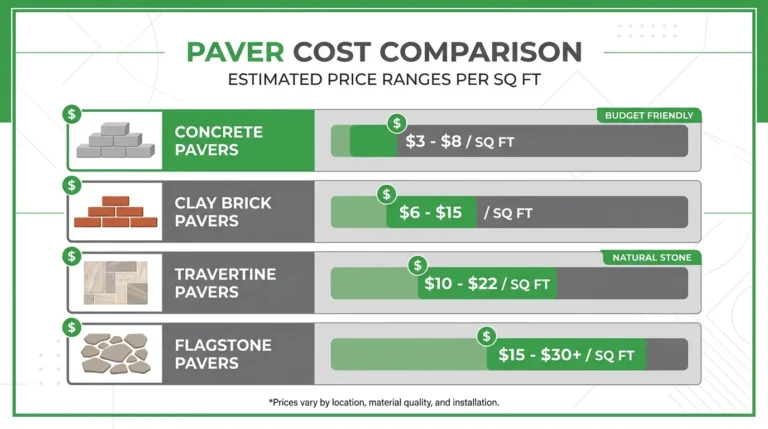
Here’s real cost data based on current Bay Area market rates:
Per square foot installed: $15–$70
- Concrete pavers: $15–$30/sq. ft.
- Brick pavers: $20–$40/sq. ft.
- Natural stone pavers: $40–$70/sq. ft.
- Permeable pavers: $20–$50/sq. ft.
Average driveway size: 400–600 sq. ft.
Typical total project cost: $6,000–$28,000 depending on material choice, site conditions, and whether drainage work is needed.
What drives costs up:
- Poor soil requiring extra base depth
- Complex drainage systems (French drains, underground tanks)
- Curved or intricate patterns requiring more cuts
- Demolition and removal of existing driveway
- Permits and inspections
What you save long-term: Paver driveways cost less to maintain than concrete or asphalt. Individual paver replacement runs $5–$15 per paver versus $500–$2,000 to patch a concrete slab.
DIY vs. Professional Paver Driveway Installation
Be honest with yourself here.
DIY makes sense if:
- The area is under 200 sq. ft.
- You have access to a plate compactor (rent for $150–$200/day)
- You’re comfortable with physical labor over 2–3 days
- The site has good natural drainage and no major grading challenges
Hire a pro if:
- Your driveway is a full two-car size or larger
- Your yard has drainage issues or clay soil
- You want a specific pattern, border, or design
- You need permits pulled and inspections passed
- You want a warranty on the work
Questions to ask any contractor:
- Do you carry liability insurance and workers’ comp?
- How deep will the base be, and what gravel spec will you use?
- What type of edge restraint do you use?
- Will you use polymeric sand or regular sand?
- How do you handle drainage?
A contractor who can’t answer those questions clearly is a red flag.
Get Professional Results with Lakota Design Group
If you want it done right the first time, paver installation services in San Jose don’t get more experienced than Lakota Design Group. Our team has installed hundreds of paver driveways across Santa Clara County, working with Bay Area soil conditions, local permit requirements, and the specific drainage challenges that come with our climate.
We take care of everything from applying for permits to the final compaction. For every task, we use the right ASTM-graded foundation materials, vehicular-rated pavers, and polymeric sand. Our craftsmanship guarantee means that your driveway will look and work great.
FAQs About Paver Driveway Installation
How deep should I excavate for a paver driveway?
Excavate 12–15 inches below finished surface level. This gives you room for 6–8 inches of compacted base, 1 inch of bedding sand, and the paver thickness (typically 2.375–3.125 inches).
What is the best base material for a paver driveway?
Road base gravel meeting ASTM D 2940 spec (⅝” minus crushed stone) is the standard for traditional installs. For permeable systems, use ¾-inch washed crushed stone (ASTM No. 57).
Can I install pavers over my existing concrete driveway?
Yes, in some cases. This is a specialty install and only works well in climates without heavy freeze-thaw cycles. A hardscape professional or engineer should assess the existing concrete first.
How long does a paver driveway last?
A properly installed paver driveway lasts 25–30 years or longer with basic maintenance.
Do I need a permit to install a paver driveway in San Jose?
Yes. Most Bay Area cities require a permit for driveway construction. Check with your local building department before starting work.
What is polymeric sand and why does it matter?
Polymeric sand contains binding agents that harden when wet. It locks pavers together, prevents joint erosion, blocks weed growth, and keeps insects from burrowing into the joints. It outperforms regular sand in every way.
What causes pavers to sink after installation?
Sinking almost always means the base was not compacted properly, was too shallow, or water is undermining the bedding layer. Proper base preparation is the single most important factor in paver longevity.